Engg-121 (2)
This document was uploaded by user and they confirmed that they have the permission to share it. If you are author or own the copyright of this book, please report to us by using this DMCA report form. Report DMCA
Overview
Download & View Engg-121 (2) as PDF for free.
More details
- Words: 13,643
- Pages: 55
Loading documents preview...
1
PRACTICAL MANUAL ---------------------------------------------------------------------------
Course Title Credits Course No.
Course Semester
: Soil and Water Conservation Engineering : 2 (1+1) : ENGG - 121 : B.Sc. (Hons.) Agriculture : II Semester (New)
---------------------------------------------------------------------------
Compiled by Prof. B.P. Sawant Dr. R.G. Bhagyawant Under the Guidance of Dr. U.M. Khodke, Head Department of Agril. Engineering, College of Agriculture, Parbhani
Vasantrao Naik Marathwada Krishi Vidyapeeth, Parbhani : 431 402 (2018)
Soil & Water Conservation Engineering
2
PRACTICAL NO. 1 TITLE : GENERAL STATUS OF SOIL CONSERVATION IN INDIA Soil degradation in India is estimated to be occurring on 147 million hectares of land which includes;
94 Mha from water erosion, 16 Mha from acidification,
14 Mha from flooding,
9 Mha from wind erosion,
6 Mha from salinity, and
7 Mha from a combination of factors.
The causes of soil degradation are both natural and human-induced. Natural causes include earthquakes, tsunamis, droughts, avalanches, landslides, volcanic eruptions, floods, tornadoes, and wildfires. Human-induced soil degradation results from land clearing and deforestation, inappropriate agricultural practices, improper management of industrial effluents and wastes, over-grazing, careless management of forests, surface mining, urban sprawl, and commercial/industrial development. Inappropriate agricultural practices include excessive tillage and use of heavy machinery, excessive and unbalanced use of inorganic fertilizers, poor irrigation and water management techniques, pesticide overuse, inadequate crop residue and/or organic carbon inputs, and poor crop cycle planning. Some underlying social causes of soil degradation in India are land shortage, decline in per capita land availability, economic pressure on land, land tenancy, poverty, and population increase. Effects of Soil Erosion in India
Soil erosion results in huge loss of nutrients in suspension or solution, which are washed away from one place to another, thus causing depletion or enrichment of nutrients.
Besides the loss of nutrients from the topsoil,
There is also degradation through the creation of gullies and ravines.
Water causes sheet-wash, surface gullies, tunnels and scours banks in rivers.
In hot and dry climate of India, wind blowing is the main cause of soil erosion.
Indian government is adopting adequate measures to reduce the unpleasant effects of soil erosion in India particularly in the states like Punjab, Maharashtra, Karnataka.
Soil & Water Conservation Engineering
3
Introduction to Soil Conservation: Soil and water conservation is essential to protect the productive lands of the world. In our country, where droughts, famines and floods cause crop damage almost every year, soil conservation will not only increase crop yields but also prevent floods and further deterioration of land. Prior to the days of independence, while general problems of soil erosion were known, answers to them backed by scientific investigations were not known. Consequently, during the framing of the first year plan and early in the second five year plan, a chain of 9 Soil Conservation Research Demonstration and Training Centres were established
Soil & Water Conservation Engineering
4
Broad objectives of these Centre’s are: (i) To identify erosion problems and conservation of land and water resources under different land use systems, Soil & Water Conservation Engineering
5 (ii) To evolve mechanical and biological methods of erosion control under different land use systems, (iii) To evolve methods of control of erosion and reclamation of ravines stabilization of landslides and hill torrents, (iv) To evaluate hydrological behavior and evolve techniques of watershed management under different systems, (v) To set up demonstration projects for popularizing soil and water conservation measures, (vi) To impart specialized training in soil and water conservation to gazetted and nongazetted officers of State Governments. Important Soil and Water Conservation Programmes implemented by state and central Govt.
Soil conservation in catchments of river valley project (RVP).
Integrated Watershed Management in the catchments of flood Prone Rivers (FPR).
Centrally Aided Drought Prone Area Development Program (DPAP), (as per 1995 guidelines) implemented by Government and NGO. Desert Development Programme ( DDP)
National Watershed Development Program for Rain fed Area (NWDPRA) implemented by Dept. of Soil Conservation & Watershed Management, Gov.M with financial support from Department of Agriculture, Gov.I
Operational Research Projects on Integrated Watershed Management (ICAR)
World Bank Project on Watershed Development in Rain fed Area.
Council for Peoples Action & Rural Technology (CAPART) supported 38 Watershed Development Programs in Maharashtra
DPAP & IWDP projects (of 2001 guidelines) in Satara, Sangali& Nasik Districts of Maharashtra state.
NABARD Holistic Watershed Development Programme
Vasundhara Watershed Development Project
Maharashtra government has launched a new programme named ‘JalyuktaShivarAbhiyan’ in a state on January 26, 2015. The programme aim to make 5000 villages free of water scarcity every year and to conserve and protect the soil from further degradation. This Abhiyan aims at initiating permanent measures to make the state drought free by 2019 and to harvest rain water within the village boundary thereby increasing ground water levels.
Soil & Water Conservation Engineering
6
PRACTICAL NO. 2 TITLE
: STUDY OF SURVEYING INSTRUMENTS
Instruments for measuring distance 1.
Chain
A) Metric Surveying Chains
-
20 meter or 30 meter
B) Non Metric Surveying Chains i) Gunter’s Chain 2.
Arrows
3.
Tapes
ii) Revenue Chain
iii) Engineer’s Chain
i)
Cloth or Linen Tape ii)
Woven Metallic Tape
iii)
Metric Steel Tape
Invar Tape v) Synthetic Tape
4.
Wooden pegs
5.
Ranging rods
6.
Ranging poles
7.
Offset rod
8.
Laths
9.
Whites
10.
Plumb bob
11.
Open cross-staff
12.
Optical square
iv)
1. Chain – The chain is composed of 100 or 150 pieces of galvanized mild steel wire 4 mm in diameter (8 s.w.g.) called links. The length of each link is 20 cm (0.2 m). The ends of each link are bent into a loop and connected together by means of three oval rings, which afford flexibility to the chain. The ends of the chain are provided with brass handles for dragging the chain on the ground, each with a swivel joint so that the chain can be turned round without twisting. The outside of the handle is the zero point or the end point of the chain. The length of the chain is measured from the outside of one handle to the outside of the other. The length of a link is the distance between the centers of the two consecutive middle rings. The end links include the handles. Metallic tags or indicators of distinctive pattern called tallies are fixed at various distinctive points of the chain to facilitate quick reading of fractions of a chain in surveying measurements. (Draw Figure) Soil & Water Conservation Engineering
7 A) Metric Surveying Chain: The chains are made in lengths of 20 and 30 meters. To enable the reading of fractions of a chain without much difficulty, tallies (tags) are fixed at every five metre length and small brass rings are provided at every metre length except where tallies are attached. To facilitate holding the arrows in position with the handle; a groove is cut on the outside surface of the handle. The handles are joined to link by swivel joint. The tallies used for marking the distances in a metric chain are marked with letters ‘m’. B) Non Metric Surveying Chains i) Gunter’s chains – The Gunter’s chain is 66 ft. long and divided into 100 links each of 0.66 ft. It is very convenient for measuring distances in miles and furlongs and for measuring land when the unit of area is an acre on account of its simple relation to mile and acre. 10 Gunter’s chain equals 1 furlong, 80 Gunter’s chain equal to a mile and 10 Square Gunter’s chain 1 acre. ii) Revenue Chain – The revenue chain is commonly used for measuring fields in cadastral survey. It is 33 ft. Long and divided into 16 links. One Square revenue chain equals one guntha. iii) Engineers’ Chain – The engineers’ chain is 100 ft. long and is divided into 100 links each one-foot in length. It is used on all engineering surveys. The distances measured with the engineers’ chain are recorded in feet and decimals. 2. Arrows- Arrows are also called marking or chaining pins and are used to mark the end of each chain during the process of chaining. They are made of good quality hardened steel wire 4 mm (8 s.w.g.) in diameter. The arrow are made 400 mm in length pointed at one end for inserting into ground and bent into a ring at the other end for facility of carrying. (Draw Figure) 3. Tapes
Cloth and Linen Tape – Used for taking subsidiary measurements, such as offsets. It is very light and handy. It is easily affected by damp. If wet, it shrinks. It stretches easily and likely to twist.
Soil & Water Conservation Engineering
8
Metric Woven Metallic Tape - They are available in 2, 5, 10, 20, 30 and 50 metres. The tape is made of yarn and metal wire. A metal ring is attached to the outer end of tapes. The length of the tape includes the metal ring. At every centimetre a black line 8 to 10 mm in height is drawn. Every five centimetres is marked with an arrow in black. Every decimetre and meter is marked with a back line extending over the full width of the tape (i.e.16 mm). The graduation marks at every decimetre and meter are numbered with black and red figures, respectively.
Metric Steel Tape - Tape is available in 1, 2, 10, 30 and 50 meters. The tape is of steel or stainless steel. The outer end is provided with a ring. The length of the tape includes the metal ring. The tape is marked legible with a line at every five millimetres, centimetres, decimetres and metre. Every decimetres and metre shall be marked with Hindu Arabic numbers in bold. When button release device is pressed, the tape automatically rewinds into case.
Invar tape - For highest precision work, the invar tape is used. It is made of an alloy of steel and nickel (36 %). It is 6 mm wide and may be obtained in lengths of 30 m, 50 m and 100 m. It is not calibrated throughout its length but has terminal lines. Each terminal division has ten 1 mm divisions. It is very expensive.
Synthetic Tape – These tapes are manufactured of glass fiber having PVC coating. They are graduated every 10 mm and figured every 100 mm. Metre figures are shown in red. They are convenient for measuring short lengths.
4. Wooden Pegs - These are used to mark the positions of stations. They are made of hard timber and tapered at one end. They are usually, 2.5 cm square and 15 cm long. But in soft ground 40 to 60 cm long pegs and 4 to 5 cm square are suitable. They should be driven in the ground with about 4 cm lengths projecting above the ground. (Draw Figure) 5. Ranging rod - The ranging rods are used for marking the position of stations for ranging the lines. They are made of well-seasoned straight-grained timber of teak. They are circular or octagonal in cross section of 3 cm nominal diameter. Lower shoe is 15 cm Soil & Water Conservation Engineering
9 long. They are made of two sizes as 2 m and 3 m and are divided into each 0.2 m length. In order to make them visible from a distance they are painted alternately black and white or red and white. Now days instead of timber, mild steel hallow pipes are used. (Draw Figure) 6. Ranging Poles - Similar to the ranging rods but are heavier. They vary in length from 4 m to 6 m or more. Used in the case of very long lines. 7. Offset Rods – Similar to the ranging rod. It is usually 3 m long and is divided into parts each 0.2 m length. Top is provided with a open ring for pulling or pushing the chain through a hedge. It has two short narrow vertical slots. It is used for aligning the offset line and measuring short offsets. 8. Laths – Useful for ranging long lines. Also used over uneven ground when the ranging rod is not visible due to obstructions. They are light, cheap. Being white, they are easily visible at a great distance usually 1.0 m long. 9. Whites – When the ranging rods are not available or insufficient whites are used. These are thin strip of bamboo and 40 cm to 1 m in length. One end is sharp and the other end is split for inserting pieces of white papers. They are also useful for temporary marking of contour points. 10. Plumb Bob - The plumb bob is required when measuring distance along slope to transfer point to the ground. It is also used far accurate centering over a station, and for testing the verticality of ranging rod. (Draw Figure) 11.
Open cross-staff- It is a simple. It consists of two parts: - 1) the head; 2) the leg.
The common type of cross staff consists of 4 metal arms with vertical slits for sighting through. The head is fixed to the top of an iron stand about 1 .2 to 1.5 m long this is driven in to the ground. 12.
Optical square- An optional square is a compact hand instrument used in setting
out right angles with greater accuracy than a cross staff. It consists of a circular box about 5 cm in diameter and 1.25 cm deep in which two mirrors are fitted at right angles to the plane of instruments.
Soil & Water Conservation Engineering
10
PRACTICAL NO. 3 TITLE : STUDY OF LEVELLING INSTRUMENTS Instruments Required: Dumpy level with stand, levelling staff, chain, or tape and a level field book for recording staff readings, distances etc. Objectives:
1. To study the parts of dumpy level. 2. To study the setting up dumpy level 3. To read the Leveling staff.
Dumpy level: It is the most commonly used level. This instrument is short and stout, hence the name as dumpy. Parts of Dumpy level: 1. Levelling head
2.Telescope
3. Eyepiece
4. Diaphragm
5. Focusing screw
6.Ray shade
7. Level tube nuts
8.Level tube
9. Cross bubble tube. Levelling Staff: It is telescopic pattern self-recoding staff, usually 4m long when fully extended. The solid top length of 1.25 m long slides into central bore 1.25 m long, which in turn slides into the lower or bottom box 1.5 m. Each length when pulled out to its full length is held in position by means of a brass spring catch. Each metre is subdivided into 200 divisions, each division being 5 mm. The metre numeral is in red and marked to the right and the decimeter numeral in black and marked into the left. The staff appears upside down when viewed through the telescope so that the readings are taken from above downwards. Adjustments of the level: Two kinds 1.Temporary and 2. Permanent Temporary Adjustments: The temporary adjustments are those, which have to be performed at each set up of the level. They are a) Setting up the level and b) Focusing the eyepiece and object glass.
Soil & Water Conservation Engineering
11
Setting up the level :
i) Fixing the instrument on the tripod: Hold the instrument in the right hand and fix it on the tripod by turning round only the lower part with the left hand. ii) Leg adjustment: Place the instrument at convenient height for sighting with the tripod legs spread well apart a nearly as can be judged by the eye. Bring all foot screws in the center of their run. Fix any two legs firmly into the ground and move third leg to the right or left until the bubble is approximately in the center. Then move it in or out until the bubble of cross tube is approximately in the center. Finally the leg should be fixed in such a position that both bubbles are approximately in the center of their run. iii) Levelling up: Place the telescope parallel to any pair of foot screws and bring the bubble to the center of its run by turning these screws equally either both inwards or outwards. Turn the telescope through 900 so that it lie over the third screw and center the bubble by turning this screw. Bring the telescope back to its original position. Again bring the bubble to the center of its run and repeat these operations until the bubble remains in the center of its run in both positions. If the instrument is in adjustment, the bubble will remain center for all directions of the telescope. iv) Focusing the eyepiece: Remove the lid of the object glass and hold a sheet of white paper in front of it. Move the eyepiece in and out until the cross hairs are distinctly seen. v) Focusing the object glass: Direct the telescope towards the staff and on looking through the eyepiece, bring the image of the staff between the two vertical hairs or lines of the diaphragm. Adjust the objective by turning the focusing screw until the image is clear and distinct. Reading the Staff: i) Having set up and levelled the instrument carefully, direct the telescope towards the staff held vertically on the staff station and focuses it. ii) Always bring the staff between the two vertical hairs/lines and always use the portion of the horizontal cross hair between them in reading the staff. Reading should be Soil & Water Conservation Engineering
12 taken at intersection. First note the red figure, then the black figure and finally count the spaces. Record the reading in field book. Systems of taking out the reduced level of point from the staff reading: 1. The Collimation System - It consist in finding the elevation of the plane of collimation (H.I.) for every set up of the instrument, and then obtaining the reduced level of points with reference to the respective plane of collimation.
Elevation of plane of collimation for the first set up of the level is determined by adding back sight to R.L. of B.M.
The R.L. of intermediate point and first change point are then obtained by subtracting the staff reading taken on the these point (I.S. and F.S.) from the elevation of plane collimation.
When the instrument is shifted to the second position a new plane of collimation is set up.
The levels of the two planes of collimation are
correlated by means of B.S. and F.S. on C.P. The elevation of this plane is obtained by adding the new B.S. taken on the C.P. from the second position on the level to the R.L. of first C.P. The R.L. of successive point and second C.P. are found by subtracting their staff readings from the elevation of this plane of collimation. Arithmetical Check The difference between the sum of the back sights and the sum of the foresights should be equal to the difference between the first and last reduced level. B.S.- F.S. = Last R.L. - First R.L. 2. Rise and Fall SystemIt consists in determining the difference of level between consecutive points by comparing each point after the first with that immediately preceding it. The difference between their staff reading indicates a rise or a fall according as the staff reading at the point is smaller or greater than that at the preceding point. The reduced level of each point is then found by adding the rise to, or subtracting the fall from the reduced level of the preceding point. Soil & Water Conservation Engineering
13 Arithmetical Check There are three checks on the accuracy of the reductions. The difference between the sum of the back sights and the sum of the foresights = the difference between the sum of the rises and that of the falls = The difference between the first and last reduced levels. B.S. F.S. = rise - fall = Last R.L. - First R.L. Example: The following readings were taken successively with a level and levelling staff. 0.250, 0.500, 0.300, 1.565, 2.150, 3.560, 0.450, 1.260. The level was shifted after 3rd and 6th reading. Record these readings in the table and find out the reduced levels (RL) of different points. Assume RL of the first point as 100 m. Apply usual checks. Solution: 1. The Collimation System (Height of instrument method) Station Staff Reading B.S 1
5
1.565
99.750 0.300 101.515 99.950 C.P
2.150 0.450
6
∑
Remarks
100.250 100.00 B.M. 0.500
4
R.L.
F.S
0.250
2 3
I.S
H.I
2.265
99.365 C.P. 3.560 98.405
97.955
1.260
97.145 L.P
5.12
Arithmetical Check The difference between the sum of the back sights and the sum of the foresights = Soil & Water Conservation Engineering
14 The different between the first and last reduced levels B.S. F.S. = Last R.L. - First R.L. 2.265-5.12 = = 97.145 -100.00 2.855 = 2.855 2. Rise and Fall SystemStation Staff Reading B.S
I.S
Rise
Fall
100.00 B.M. 0.500
2 1.565
3
0.250 99.750 0.300 0.200
2.150
4 0.450
5 6
∑
Remarks
F.S
0.250
1
R.L.
2.265
99.950 C.P 0.585 99.365 C.P.
3.560
1.410 97.955
1.260
0.810 97.145 L.P
5.12
0.200 3.055
Arithmetical Check The difference between the sum of the back sights and the sum of the foresights = the difference between the sum of the rises and that of the falls = The difference between the first and last reduced levels B.S. F.S. = rise - fall = Last R.L. - First R.L. 2.265-5.12 =0.200- 3.055 = 97.145 -100.00 2.855 = 2.855 = 2.855 Soil & Water Conservation Engineering
15
PRACTICAL NO. 4 TITLE : CHAIN TRIANGULATION SURVEY Land surveys are made to secure data for exact description of the boundaries of a piece of land, to determine its area, to secure necessary data for making a plan, to reestablish the boundaries of a piece of land which has been previously surveyed and to divide a piece of land into a number of units. There are two general methods of land surveying:1) Triangulation and 2) Traversing 1) TRIANGULATION SURVEY: - In triangulation survey, the lines of survey form a network of triangles. It is the system of surveying in which the area is divided into simple geometrical figures and the work is carried out by taking its measurement. 2) TRAVERSING: - A traverse survey is one in which frame work consists of series of connected lines, the lengths and directions are measured by chain or tape and with an angular instruments respectively. It is classified as – a) open traverse b) closed traverse. a) Open traverse: - It consists of series of lines but not returning to the starting point. Also it does not start and end at points whose positions on plan are known. b) Closed traverse:- It is said to be closed traverse, when a complete circuit is made i.e. when it returns to the original position and forms a closed polygon. The principle of chain surveying is triangulation. It is the simplest kind of surveying in which the sides of various triangles are measured directly in the field. FIELD SURVEY BY TRIANGULATION METHOD Principle of Triangulation: A survey in which the given field or area is divided into number of suitable triangles and measurement of all the sides of triangles is done is known as triangulation survey. Triangle is only a plain geometrical figure knowing the three sides of which it can Soil & Water Conservation Engineering
16 be plotted exactly in size and shape. No angular measurement is required. For this survey field must be accessible and vision free stations. INSTRUMENTS & MATERIAL – Chain, tape, ranging rods, arrows and drawing material. PROCEDURE: 1. Erect ranging rods at all the corner point stations of the field. 2. Prepare a rough figure of a field on a page of field book and divide this into number of suitable triangles. A suitable triangle is that in which no angle is too acute or obtuse i. e. not less than 30º and not more than 120º. 3. By direct ranging measure the lengths of all the sides of all the triangles and note down the measurements in a field book and also on a rough drawing. OBSERVATION TABLE Sr. No.
Line
1 2 3 4 5 6 7 8 9 10 11
Soil & Water Conservation Engineering
Length (m)
Remarks
17 PLOTTING: 1. Select a suitable scale for the preparation of a plan taking into consideration the size of paper and field measurements. 2. With this selected scale, plot one side of any triangle. With the same scale draw two arcs by a compass from the ends of this side, equal to the lengths of remaining sides of a triangle. The intersection of these two arcs fixes the third station. Join this station with the ends of the side. A triangular portion of a field is plotted. 3. Construct next triangular portion by taking a suitable side of this triangle by the same procedure. In this way plot all the triangular areas. After plotting all the triangular areas, plan of field is obtained. CALCULATION OF AREA OF A FIELD: For calculation of area of a field, calculate individual areas of all the triangles by a semi perimeter formula which is as under: S= a+b+c 2 ___________________ Area of triangle =√ S (S – a) (S – b) (S- c) a, b, and c are the three sides of any triangle. The sum of all the triangular areas is equal to total area of a field. Sr. No.
Triangle
1 2 3 4 5 6 7 Total Area,m2 Soil & Water Conservation Engineering
Area , m2
18
PRACTICAL NO. 5 TITLE: PLANE TABLE SURVEY (Radiation method) Objective: To measure the area of the field by using PTS (Plane Table Survey Method). Plane Table Surveying Plane table is a graphical method of surveying in which the field works and the plotting is done simultaneously. It is particularly adopting in small mapping. Plane table surveying is used for locating the field computation of area of field. Merits:
It is most suitable for preparing small scale map or surveying small area.
It is most rapid method.
Field book is not necessary.
No great skill is required for satisfactory map.
It is particularly suitable for magnetic area where prismatic compass is not reliable.
Contour and irregular object may be represented accurately.
It is less costly.
Demerits:
Plane Table Essentially a tropical instruments.
It is not suitable to work in wet climate.
There are several accessories to be carried out and therefore they are likely to be lost.
It is not suitable for accurate work.
Instruments: Plane Table (drawing board), Alidade, Trough Compass, Spirit Level, Plumbing fork, Drawing Material, chain, arrows, ranging rods etc. 1. Drawing board mounted on tripod A sheet of drawing paper, called plane table sheet is fastened to the board. Board is made up of well-seasoned wood such as teak of size 40x30 to 75x60cm. it had plane and smooth top. It is mounted on a tripod in manner that it can be leveled. Leveling up of the table is done by shifting the legs of tripod. Some tripod provided with leveling screw or by ball and socket head for accurate leveling. Soil & Water Conservation Engineering
19 2. Alidade: Alidade consists of two vertical sight vane fitted at end the end of straightedge. The straight edge ruler usually made of brass or teak wood graduated beloved edge. One of the sight veins is provided with narrow slit and the other with a central vertical wire or hair. Beveled working edge alidade is called fiducial edge. 3. A Through compass for marking the direction magnetic meridian on paper. 4. Sprit level for leveling the table. 5. Forked plumb for centering the table. 6. Water proof cover to protect the sheet from rain. Setting up plane table The plane table is set approximately waist-high, so that the surveyor may bend over the board without resting against it. The plane table is set by following three operations at any station i.e. fixing, centering and orientation processes. Fixing: Table should be set at a convenient height for working. The legs of tripod stand should be spread apart and firmly fixed on the ground. Centering: It is the process of keeping the table over the station that the point on the paper representing the station being occupied is vertically over the point on the ground. It is done by forked plumb bob. Orientation: When the table has to be set up at more than one station it is necessary that it is oriented so that the lines on the paper remain parallel to the lie which they represent on the ground. So orientation is “the process of keeping the table to the position which is occupied at the first station”. Orientation is done by two methods: By use of the magnetic needle. Orientation by back sighting. Orientation by the magnetic needle: To orient the table at any subsequent station, the through compass(or circular box compass) is placed along the line representing the magnetic meridian which has been drawn on the paper at the first station, and the board is then turned until the ends of the needle o\are opposite the zeros of the scale. The board is then clamped in position. It is suitable for rough small scale mapping. Soil & Water Conservation Engineering
20 Orientation by back sighting: This is the most accurate method of orientation and is always be preferred. Suppose a table is set up over station Q on the line PQ which has been previously drowned as PQ from station p. The alidade is placed along the line QP and board then turned until the line of sight bisects the ranging rod at P. Board is then properly clamped. Methods of plane tabling 1. Radiation: 2. Intersection: 3. Traversing: 4. Resection: 1. Radiation In this position the point is located on plane by drawing a ray from the plane table station to the point, and plotting scale along the ray the distance is measured from the station to the point. The method is suitable for the survey of the small areas which can be commanded from a single station Procedure for Radiation plane table survey:
Select appoint p so that all points to be located are visible from it.
Set up the table at p and leveled.
Marked the direction of magnetic meridian with through compass in top corner of sheet.
Select the point p on the sheet so that it is exactly over station p on the ground.
Centering the Alidades on p, sight the various points A, B, C etc. and draw the rays along edge of Alidades.
Measure the distance PA, PB, PC etc. from p to various points with chain or tape and plot them to scale along the corresponding rays. Join the points a, b, c, etc. to give outline of survey.
Measure the sides of various triangles formed such way and calculate the areas of different triangles by semi perimeter formula. Add all areas to get total area of the field.
Soil & Water Conservation Engineering
21
PRACTICAL NO. 6 TITLE : ESTIMATION OF RUNOFF BY RATIONAL METHOD Rational Method: To design soil conservation structures with the proper capacity and to meet the need of respective condition it is necessary to estimate peak runoff rate. There are number of formulae and methods for calculating the maximum rate of runoff for given area. The rational method is used for calculating the maximum rate of runoff for a given area. The rational method is commonly used in predicting peak runoff rate of small watershed. The rational formula proposed by C.E. Ramser is expressed in F.P.S. unit as Q = CIA
....1
Q = Design peak runoff rate, ft3 / sec. C = Runoff coefficient I = Maximum average rate of rainfall over the entire drainage area which may occur during the time of concentration, inches / hr.. A = Watershed area in, acres. Since 'C' is dimensionless coefficient formula may be readily converted into metric unit as under. Q = 0.0276 CIA
…..2
In which, Q = Design peak run-off rate, m3 / Sec C = Runoff coefficient. I = Maximum average of rainfall over the entire area which may occur during the time of concentration, cm / hr A = Watershed area, hectare.
Soil & Water Conservation Engineering
22 Value of 'C' in rational formula Slope %
Sandy loam
Clay & silt loam
Stiff clay
1. Wood land 0-5 %
0.10
0.30
0.40
5-10 %
0.25
0.35
0.60
10-30 %
0.30
0.50
0.60
0-5 %
0.10
0.30
0.40
5-10 %
0.16
0.36
0.55
10-30 %
0.22
0.42
0.60
0-5 %
0.30
0.50
0.60
5-10 %
0.40
0.60
0.70
10-30 %
0.52
0.72
0.82
2. Pasture land
3. Cultivated land
The rational method is applicable for watershed area less than 1300 ha. The method is based upon two assumptions. 1.
Rainfall occur at uniform intensity for a duration, at least equal to time of Concentration.
2.
Rainfall occurs at uniform intensity over entire area of watershed.
Since there are hardly rainfalls satisfying both the conditions. The estimation of runoff based on this method is rather approximate. However, the method is considered sufficiently accurate for run-off estimation on design of expensive structure where the consequence of failure is limited. Design run-off is the rate to measure surface runoff by basic hydrograph method and unit hydrograph method. Time of concentration: The time of concentration of watershed is the time required for runoff water to Soil & Water Conservation Engineering
23 flow from the most remote ( in time of flow ) point area to outlet. When duration of storm is equal to the time of concentration, it is assumed that all parts of watershed are contributing simultaneously to the discharge of outlet. Time of concentration vary greatly with the nature and extent of vegetation in a given watershed. However, reasonable estimation of time of concentration can be obtained by dividing distance from the most remote point to the outlet of the area by the average velocity selected. Average velocity is used to determine the time of concentration Average slope of channels measured from farthest point of watershed to outlet
Velocity, meter /sec
1-2 %
0.6
2-4 %
0.9
4-6 %
1.2
6-10 %
1.5
Another approach to estimate the time of concentration is by the application of following empirical formula. Tc = 0.0195 L 0.77 S - 0.385 ...3 In which,
Tc = Time of concentration, minutes L = Maximum length of flow, metre S = Average slope of area, metre / metre.
Problem: 1.Estimate peak run-off rate for a 10 years recurrence interval and time of concentration, if the intensity of 1 hr. rainfall expected in 6.3 cm . Watershed is composed of 20 ha. of cultivated crop on 3% slope and 30 ha. of pasture on 7% slope in silt loam soil. Maximum length of path of water particles is 700 m and average slope of path is 4 %. (The rainfall intensity for calculated Tc is 16.5 cm/hr). 2.Determine the peak runoff rate for 35 years recurrence interval and time of concentration from an area in clay loam containing 20 ha. of cultivated land on 1 % slope. 35 ha. of pasture land on 7 % slope and 30 ha. of wood land on 12 % slope. The most remote point in the watershed is 3200 m away from outlet and 8 m below this point. The maximum intensity of 1 hour rainfall expected during the recurrence interval is 7.5 cm. (The rainfall intensity for calculated Tc is 6.3 cm/hr). 3. Calculate time of concentration where maximum length of watershed is 700 m and most remote point is 9 m above the out let point. Soil & Water Conservation Engineering
24
PRACTICAL NO.7 TITLE: ESTIMATION OF SOIL LOSS (USLE) The universal soil loss equation (USLE) developed by Wischmeier& Meyer; & the same was published in the year 1973 by Wischmeier& Meyer. This equation was designated as Universal Soil Loss Equation, and in brief it is now as USLE. Since, simple & powerful, tool for predicting the average annual soil loss in specific situations. The associated factors of equation can be predicted by easily available meteorological & soil data. The term ‘Universal’ refers consideration of all possible factors affecting the soil erosion/soil loss; and also its general applicability. The USLE is given as under: A = R K LS C P Where, A = computed soil loss, expressed in t/ha/y for a given storm event. R = rainfall erosivity factor, which is the measurement of the kinetic energy of a specific rain event or an average year’s rainfall. K = soil erodibility factor. It is the soil loss rate per erosion index unit for a given soil as measured on a unit plot. (22.1 m long with 9 % slope in continuous clean –tilled fallow) L = slope length factor. It is the ratio of soil loss from the field plot under existing slope length to that from the 22.1 m slope length (Unit plot) under identical conditions. S = slope gradient factor. It is the ratio of soil loss from the field slope gradient to that from the 9% slope (unit plot) under identical conditions. C = cover or crop rotation (management) factor. It is the ratio of soil loss from the area under specified cover and management to that from an identical area is tilled continuous fallow (unit plot). P = erosion control practices or soil conservation practices factor. It is the ratio of soil loss under a support practice like contouring, strip cropping or terracing to that under straight – row farming up and down the slope. Rainfall Erosivity Factor (R): It refers to the rainfall erosivity index, which expresses the ability of rainfall to erode the soil particles from an unprotected field. It is a numeral value. From long term field studies, it has been observed that the extent of soil loss from a barren field is directly proportional to the product of two rainfall characteristics: 1) kinetic energy of the storm; and 2) its 30- minute maximum intensity. Soil & Water Conservation Engineering
25 Soil Erodibility Factor (K): This factor is related to the various soil properties, by virtue of which a particular soil becomes susceptible to get erode, either by water or wind. Physical characteristics of the soil greatly influence the rate at which different soils are eroded. In general, the soil properties such as the soil permeability, infiltration rate, soil texture, size & stability of soil structure, organic content and soil depth, affect the soil loss in large extent. Slope Length and Steepness Factor (LS): The LS factor represents the erosive potential of a particular soil with specified slope length and slope steepness. This factor basically affects the transportation of the detached particles due to surface flow of rainwater, either that is the overland flow or surface runoff. And accordingly affects the value of soil erosion due to any given rainfall. The capability of runoff/overland flow to detach and transport the soil materials gets increased rapidly with increase in flow velocity. On steep ground surface the runoff gets increase because of increase in runoff rate. The factors- L and –S are described as under: Slope Length Factor (L): The slope length is the horizontal distance from the point of origin of overland flow to the point where either the slope gradient gets decrease enough to start deposition or overland flow gets concentrate in a defined channel. Slope Steepness Factor (S): Steepness of land slope influences the soil erosion in several ways. In general, as the steepness of slope increases the soil erosion also increases, because the velocity of runoff gets increase with increase in field slope, which allows more soil to detach and transport them along with surface flow. Crop Management Practices Factor (C): The crop management practices factor (C) may be defined as the ratio of soil loss from a land under specific crop to the soil loss from a continuous fallow land, provided that the soil type, slope & rainfall conditions are identical. The crop & cropping practices affect the soil erosion in several ways by the various features such as the kind of crop, quality of cover, root growth, water use by growing plants etc. Soil Conservation Practices Factor (P): It may be defined as the ratio of soil loss under a given conservation practice to the soil loss from up and down the slope. The conservation practice consists of mainly the contouring, terracing and strip cropping in which contouring appears to be most effective practice on medium slopes ranging from 2 to 7 per cent.
Soil & Water Conservation Engineering
26 Example 1: Calculate the annual soil loss from a given field subject to soil erosion problem, for the following information:
Rainfall erosivity index
Soil erodibility index
Crop management factor
Conservation practices factor
Slope length factor
= 1000 m.tonnes/ha = 0.20 = 0.50 = 1.0
= 0.10
Also explain, how the soil loss is affected by soil conservation practices.
Example 2: A field is cultivated on the contour for growing maize crop. The other details regarding USLE factors are as follows: K = 0.40 R = 175 t/acre LS = 0.70 P = 0.55 C = 0.50 Compute the value of soil loss likely to take place from the field. Also, make a comment on soil loss when same field is kept under continuous pasture with 95 percent cover. Assume the value of factor- C for new crop is 0.003.
Soil & Water Conservation Engineering
27
PRACTICAL NO. 8 TITLE : MEASURMENT OF SOIL LOSS (MULTI SLOT DIVISOR) Object: Measurement of soil loss from the field by using multi slot divisor. Multi slot divisor is useful for measuring runoff from small plots. It can measure quantity of runoff and can estimate soil loss from field. Its design and application is very simple. Mostly used for experiment purpose. It has mainly three parts:
Collection tank
Slot divisor (spout)
Cistern tank
1. Collection tank: The collection tank is used to collect the runoff water from the plot. The water is diverted from the plot and discharged into the collection tank. The tank has four compartments of different dimensions. The dimension of the collection tank varies according to the size of the plot and probable runoff to be collected. The probable runoff is calculated considering the plot size and maximum daily rainfall of the area. The collection tank is provided with roof cap to avoid rain water falling into the tank. The tank is provided with a provision to attach slot divisor. 2. Slot Divisor: The slot divisor with number of slots is used for experimentation, in which one slot is connected to the cistern tank. The divisor is always provided with the odd number of slots. The number of slot are decided as per the volume of water is to collected from the experimental plot. Larger the quantity of runoff, more are the slots and vice versa. It is also covered with cap on its top. The middle slot connected to the cistern tank, to collect excess runoff. 3. Cistern tank: It is the tank connected to the slot divisor to collect the runoff water for final measurement. The capacity of the cistern tank is decided as per the probable runoff and number of slots. Procedure: 1. Select the particular field from where soil loss is to be measured. 2. Generally, the dimensions of the field are selected as 15 x 4 m 3. Mark the plot boundary by erecting GI sheets along the boundary of plot such that no runoff water will enter into the experimental field Soil & Water Conservation Engineering
28 4. The runoff collection channel is constructed to divert the runoff water towards collection tank. 5. Pipe is used to convey the runoff water into the tank. 6. At the end of the plot pit is excavated to install the multi slot assembly to collect runoff water and runoff samples. Calculation of runoff volume and soil loss: Runoff volume: The runoff water collected in the Cistern tank is measured by using following formula
Where,
V = volume of runoff water, m3 r = radius of cistern tank, m h = height of tank, m
This is the volume of runoff water collected through one slot. Convert it into total volume of water collected from the plot considering the number of slots of the divisor. Then, calculate total volume of runoff water collected from one hector of land. Soil loss: 1. The runoff samples are collected from the collection tank in the bottles with continuous stirring of water. 2. Add alum to the water samples to allow the settlement of sediment in the sample bottles. 3. Keep it for 24 hrs for settlement. 4. Remove water from bottles. 5. Keep the soil/sediment for 24 hrs at 105 0C in oven dryer. 6. Then take dry weight of soil. 7. Calculate the soil loss in kg per hector.
Soil & Water Conservation Engineering
29
PRACTICAL NO. 9 TITLE: STUDY OF GRASSED WATERWAYS Vegetative waterways are natural or constructed waterways shaped to require dimensions and vegetated for safe disposal of runoff from a field, diversion, terrace or other structures. Satisfactory performance of vegetated waterways depends on its having the proper shape, as well as the preparation of the area in a manner to provide conditions favorable to vegetation growth. The grass in the waterways should be established before any water turned into it. The velocity in the grassed waterways should be kept within the permissible limit for different types of soil and these limits are presented below table. Permissible velocity in grassed waterways for different soil types Type of soil
Maximum permissible velocity (cm/sec)
Sand and silt
45
Loam, sandy loam and silt loam
60
Clay loam
65
Clay
70
Gravelly soil
100
Design Vegetative waterways are generally designed to carry the maximum runoff from a storm of 10-year recurrence interval. Runoff can be estimated by the Rational Method. Shape Vegetated waterways may be built to three general shapes or cross-sections, namely, parabolic, trapezoidal or V-shaped. Parabolic waterways are most common and generally are the most satisfactory. It is the shape ordinarily found in nature. V-shaped channels can be easily constructed with a V-ditcher and trapezoidal channels with a Vditcher and a buck scrapper, and hence these sections are preferred constructed channels. Broad-bottom trapezoidal channels require less depth of excavation than parabolic or Vshapes for the same capacity. Thus there are number of factors which govern the selection of shape. Soil & Water Conservation Engineering
30
Channel Grades Grassed waterways generally run down the slope and the channel grade is usually governed by land slope. In any case, channel slope should not exceed 10 % while it is normally desirable to keep the grade within 5%. Channel Dimensions After the runoff, channel grade and design velocity have been determined, the next step is to decide on the channel dimensions. Design of vegetated waterways is based on the Manning’s formula. The coefficients of roughness (n) usually assumed in grassed waterways design is 0.04. Side slopes of channel should be 4:1 or flatter to facilitate crossing of farm equipment. A freeboard of 10 - 15 cm should be provided to take care of the sediment deposition and variation in the value of ‘n’.
Soil & Water Conservation Engineering
31
PRACTICAL NO. 10 TITLE: STUDY OF GRADED BUNDS Graded bund– Graded bunds are used in areas receiving rainfall of more than 80cm per year, irrespective of the soil texture. In clay soils, graded bunding has to be used even for areas having less than 80cm of annual rainfall. Graded bunds may be terrace consists of a widelow embankment constructed on the lower edge of the channel from which the soil is excavated. The channel is excavated at suitable intervals on a falling contour with a suitable longitudinal grade. Function:
These terraces act primarily as drainage channel to regulate and conduct runoff at non erosive velocity.
To make the runoff water to trickle rather than to rush out.
Soil & Water Conservation Engineering
32
PRACTICAL NO. 11 TITLE: STUDY OF CONTOUR BUND AND COMPARTMENTAL BUNDING Contour Bunding are carried out in many parts of India- notably in Maharashtra, Gujarat, Tamilnadu, Karnataka and Andhra Pradesh. Definition: It consists of building earthen embankments across the slope of the land, following the contour as closely as possible. A series of such bunds divide the area into strips and act as barriers to the flow of water, thus reducing the amount and velocity of the runoff. Cultivation is not allowed on the earthen embankments of contour bunds. Therefore, under contour bunds an area of about 5 per cent is lost and is not available for cultivation. It maintains soil fertility and increases water infiltration into the soil considerably; Location of contour bund: Moderate slopes (up to 6%) with light or medium soil texture and less than 700 mm of rain per year. Purpose of contour bund: - To reduce soil erosion. - To increase the amount of water the soil can hold. Advantages of contour bund: - Simple to build. - Bunds conserve topsoil and improve productivity. - They keep water in the soil, allowing chemical fertilizers to be used effectively. - They can be used both on cultivated and uncultivated land. - Farmers can build contour bunds themselves without outside help. Limitations of contour bund: - The bunds take some land away from cultivation (though some types of crops can be grown on the bunds to stabilize them). - May create temporary waterlogging problems in heavy soil. - May interfere with the farm operations if the bunds are too close together. - A lot of labour is needed to maintain and repair the bunds. Soil & Water Conservation Engineering
33 General principles and design of contour bund: 1. Spacing of Contour bund: Bund spacing is expressed as the vertical or the horizontal distance between corresponding points on two adjacent bunds. Horizontal spacing is useful in determining the row arrangement. Vertical distance is commonly known as the vertical interval or V. I. Bund spacing should not be so wide as to cause excessive soil erosion between adjacent bunds. Spacing may be increased or decreased 10 to 20% to suit local conditions. Spacing of Contour bunds: Recommended by Gadkary Slope of land (%)
vertical interval (m)
Approx. horizontal distance (m)
0 to 1
1.05
105
1 to 1/2
1.2
98
1/2 to 2
1.35
75
2 to 3
1.5
60
3 to 4
1.65
52
2. Bund Grade: Since the contour bunds are laid along the contours, they are level bunds. 3. Bund length: In general, 400 to 500m is the maximum length of bund. The bund retains the runoff and carries it over the distance equal to bund length in one direction. The length of bund should be such that the velocity of water flowing between bunds should be nonerosive. 4. Bund cross section: The height of bund should provide sufficient storage above the bund to handle the expected runoff. In normal practice sufficient practice is provided to take care of runoff from rains expected in 10 year recurrence interval. The cross section area of the storage space required can be calculated by the following formula Cross section area of storage space = [Runoff, cm] X [Bund horizontal interval in m] / 100 Soil & Water Conservation Engineering
34 The height of bund should permit free board of about 20% as design depth [after allowing settlement of the ridge.] Compartmental bunding Compartmental bunding means the entire field is divided into small compartments with pre-determined size to retain the rain water where it falls and arrest soil erosion. The compartmental bunds are formed using bund former. The size of the bunds depends upon slope of the land. Compartmental bunds provide more opportunity time for water to infiltrate into the soil and help in conserving soil moisture. Salient features:
Compartmental bunding is an effective moisture conservation measure in dryland.
It is suitable for lesser rainfall areas and the slope is < 1%
The lands are divided into small compartments with the dimension of 8 x 5 m .
Small compartments store the rainfall for longer period.
It increases water holding capacity of the soil.
It can be formed while ploughing itself or before early sowing.
Reduces the formation of cracks.
It will overcome the disadvantages of contour bunding.
Soil & Water Conservation Engineering
35
PRACTICAL NO. 12 TITLE: STUDY OF TERRACES A terrace is an embankment or ridge of earth constructed across a slope to control runoff and minimize soil erosion or Terracing is an agricultural technique for collecting surface runoff water thus increasing infiltration and controlling water erosion known from an ancient history and used to transform landscape to steeped agro-systems in many hilly or mountainous regions. Features of terracing:
These are constructed across the slope to intercept the surface runoff and convey it to a suitable outlet, at non erosive velocity.
They reduce the length of slope by splitting the slope length in different parts.
The terracing practice is adopted for soil and water conservation in that area where land slope is greater than 10%; soil is more erodible and prevails high rainfall intensity.
Terraces not only control the soil loss by sheet flow, but also play an important role in trapping the splashed soil particles.
This practice is not possible, particularly on those hill sloped areas, where soil depth is not sufficient.
Classification of terraces:
Diversion terraces : used for intercepting the overland flow from hilly slope and channel it across the slope to a suitable outlet i.e. grassed water ways etc. built at slight down slope grade from contour. These are constructed in high rainfall area.
Magnum type: embankment
Nichols type: formed by taking the soil from side of up slope of the embankment, only.
Broad based type: This terrace is constructed with embankment and channel occupying a width of about 15 m.
Narrow based type: These terraces are only 3 to 4 m wide; the banks have steeper slop which cannot be cultivated. For cultivation to make possible, the bank should not exceed 140 slop for use of small machines, otherwise it should be 8.50 for large size machines
It is constructed by taking the soil from both side of the
Soil & Water Conservation Engineering
36
Retention terraces: these are levelled terrace, used particularly when water is required to conserve by making storage on hill sides. These are constructed in low rainfall areas.
Bench terrace: Such types of terrace are constructed in form of alternate series of shelves and risers, used to cultivate the steep slopes. These are constructed in medium rainfall areas.
Bench Terrace: A bench terrace is shelf like embankment of earth with a level or nearly level top and a step or vertical downhill face constructed along the contour of sloping land. Bench terracing consists of transforming relatively steep land into a series of levee or nearly level strips or steps running across the slope .the strips are separated by almost vertical risers. The risers if sloping may be of earth construction .steep risers are supported by masonry [stones ].bench terracing is adopted only on slopes steeper than 15%[for more than 8%]and where soil condition are favorable .the use of bench traces retards erosion losses and makes cropping operations on these slopes possible and safe. Types of bench Terraces: A] Based on slope
B]based on use /application
1] Level and table top
1] Hill type
2] Sloping inwards
2] Irrigated type
3] Sloping outwards
3] Orchard type
4] Puertorican or California type A] Classification based on slope 1] Table top bench terrace: Table top bench terrace are suitable for areas receiving medium rainfall which is evenly distributed and which have highly permeable and deep soils .in paddy fields it may be used for slopes as mild as 1% and used where irrigation facilities are available 2] Sloping inwards bench terrace: In heavy rainfall areas, bench terraces of sloping inwards type are more effective. It prevents imponding of water and useful for crops susceptible to water logging. 3] Sloping outwards bench terrace: Bench terraces sloping outwards are effective only in low rainfall areas whit a permeable soil of medium depth at lower ends graded channels are provided for safe disposal of runoff Soil & Water Conservation Engineering
37 4] Puertorican Type: In this type of terrace, the soil is excavated little during every ploughing and gradually developing bench by pushing the soil downhill against a mechanical of vegetative barrier. Mechanical or vegetative barrier is established across the land at suitable interval and the terrace is developed gradually over the years, by pushing soil downhill and subsequent natural leveling. B] Classification based on use: Depending upon the purpose for which they are used, bench terraces are classified as follows: 1. Hill type Bench Terraces: It is used for hilly areas whit a reverse grad towards the hill. 2. Irrigated Bench Terraces: Level benches are adopted under irrigated conditions. The level table top terraces are referred to as irrigated bench Terries. 3. Orchard Bench Terraces: Narrow width terraces [about 1 mm] for individual trees are prepared in this type. These are also referred as intermittent terraces and step terraces. The conversion of land into bench terraces over a period of time is referred as gradual bench terracing.
Soil & Water Conservation Engineering
38
PRACTICAL NO. 13 TITLE: STUDY OF CCT AND STAGGERED TRENCHES Contour trenches are used both on hill slopes as well as on degraded and barren waste lands for soil and water conservation and afforestation purposes. The trenches break the slope and reduce the velocity of surface runoff. It can be used in all slopes irrespective of rainfall conditions (i.e., in both high and low rainfall conditions), varying soil types and depths. Contour trenching and staggered trenching The contour trenching is also one of the practices used as soil conservation measure to intercept the runoff. In this system several trenches are excavated along the contour in a uniform level across the land slop on the top portion of the catchments. The excavated earth materials are placed at downstream side of the trench, to make the bund along that. Objectives: The function of the contour trench is to break the runoff velocity and intercept the runoff. To create more favourable moisture condition and thus accelerate the growth of planted trees. Allow to percolate rainwater through the soil and travels downside to recharge ground water in the middle and lower section of catchments. Contour trench involves the following details:
The cross section should rarely exceed 0.3x 0.3 m2. It is designed to collect and convey the runoff expected from the inter-space area of two successive trenches. Actually this space acts as catchments area to determine the trench size.
These are arranged in staggered from to make the system effective.
Trench should run perfectly level to use their full capacity at their best advantages.
The side slops of the trench are used in the range of 1:1 to 0.5:1depending upon the nature of the soil.
The contour tranches are excavated at suitable interval as per suitability of land slop.
Graded tranches: Graded tranches are identical to counter tranches in all respect expect in that they are excavated in longitudinal bed grade. These tranches are suited to area receiving high annual rainfall. Staggered tranches: The staggered trenches are constructed for shorter length, compared to the contour or graded tranches. These tranches are arranged in staggered form (i.e. not in straight line). As compared to the continuous contour trenches, per hector length of staggered trenches is reduced to half of CCT due its staggered arrangement. Soil & Water Conservation Engineering
39
PRACTICAL NO. 14 TITLE: STUDY OF GULLY PLUG, NALA BUND, CHECK DAMS AND K.T.WEIRS Nala Bund (Earthen dam): Nala bunds are structures constructed a cross nalas for checking velocity of runoff, increasing water percolation and improving soil moisture regime. Objectives 1
To impound surface runoff coming from the catchments and to facilitate percolation of stored water into soil sub strata with a view to raise ground water level in the zone of influence of nala bund.
2
To hold the silt flowing which would otherwise reach the multipurpose reservoirs and reduce their useful life.
Specific Site Conditions The feasibility of site for locating nala bund depends upon technical and economic consideration such as 1
The site should be selected in relatively flatter nala reach.
2
The slope of the nala should not be more than 2 per cent.
3
As for a possible, the catchments area of the nala bund should not be less than 40 ha.
4
There should be proper site for construction of emergency spillway by the side of the nala bund.
5
The nala bed should have soils with adequate permeability.
Earthwork computation To estimate the earthwork volume required should include the dam, allowances for settlement, backfill for the cut off trench, backfill for the existing stream channels and the holes in the foundation area etc. The common methods of estimating the Soil & Water Conservation Engineering
40 volume of earth fill i.e. the sum of the end area method, with the fill height, side slope and top width. The end area of the cross section at each station along with chain age at the center line is used for computation of earth work. Embankment side slope The side slope of a dam depends primarily on the stability of the material in the embankment. The greater the stability of fill material the steeper can be the side slope. The more unstable material flatter the side slope. Recommended side slopes for earthen embankments. Slope Horizontal to vertical Soil classification Upstream Well graded gravel, Pervious and hence not suitable sand gravel mixture Clayey gravels, silty gravels, gravel sand clay mixtures and gravel sand silt mixtures Sandy clays, silty clays, lean clays inorganic silt and clays. Inorganic clays of high Plasticity and inorganic silts.
Downstream
Pervious and hence not suitable 2.5:1
2:1
3:1
2.5: 1
3.5:1
2.5: 1
Free board. Free board is added to the height of dam. Normally 15% is provided as free board for the safety of dam. Allowance for settlement. Settlement includes the consolidation of the fill materials and the consolidation of the foundation materials due to the self-weight of the fill materials and the increased moisture caused by the storage of water. The design height of earth dam should be increased by an amount equals to 5% of the design height. Execution 1
A detailed survey of the nala at suitable location with a suitable grid of a minimum of 15 m or 5 m.
2
Detailed longitudinal survey of nala carried out and draws the longitudinal section of nala.
Soil & Water Conservation Engineering
41 3
Fixing the position of nala bund on the survey plan.
4
Decide fall supply level, high fall level and free board.
5
Decide the total length of bund.
6
Excavate the puddle trench consisting full length of bund
7
Fill the excavated puddle trench with black soil.
8
Construct the core wall with side slope1: 1 and height up to high fall level with black soil.
9
The construct of earthen embankment over core wall.
10
Stone pitching on the upstream side of the bund up to high fall level.
Construction of west weir 1
From the contour map or topographic sheet calculate the catchment area draining water to nala bund.
2
Divide it into cultivated and uncultivated area.
3
Calculate peak runoff rate for cultivated and uncultivated area.
4
Summing the runoff rate for cultivated and uncultivated area.
5
Fixed the depth of flowing over crest of weir and is equal to high fall level - full supply level.
6
Assume width of crest.
7
Calculate area of cross section of waist weir.
8
Calculate design velocity.
CHECK DAM The structures, which are constructed to check the velocity of flowing water in the gully, are known as check dams. Working principle:
They reduce the degree of slope of the gully bed by constructing series of check dams. They reduce the velocity of running water. They force the silt to deposit in the gully bed.
Soil & Water Conservation Engineering
42
The series of such breaks (checks) increases the time of opportunity of flow water in the gully. They increase the percolation rate of runoff water.
Classification of check dams: I.
Temporary Check Dams Temporary check dams constructed across the bed of a gully have two uses:
(1) To collect enough soil and water to ensure the eventual growth of protective vegetation. (2) To check channel erosion until sufficient stabilizing vegetation can be established. Woven-wire dams Woven-wire check dams may be used as temporary aids in the establishment of vegetation for the permanent control of erosion. They are used in gullies of moderate slope and small drainage areas. To construct the woven-wire dam, a row of posts is set along the curve of the proposed dam at about 1.2 m intervals and 60 to 90 cm deep. A trench about 15 cm deep and of about the same width is dug along the upstream side of the row of posts. Heavy gauge woven-wire is placed against the posts, with the lower part set in the trench so that 25 to 30 cm projects above the ground surface along the spillway interval. The wire should be securely stapled to the posts. Enough brush is laid to make an apron at least 1.2 m long extending at least 60 cm on each side of the posts that from the level portion of the spillway. Brush dams Brush dams are the least permanent of all types of check dams, but they are cheap and easy to build. They are best suited for gullies with small drainage areas and soil conditions that permit the driving of necessary anchoring stakes. Depending on the amount of brush available and the size of gully to be controlled, many types of brush dams can be used. For a distance of 3 to 4.5 m along the site of structure the sides and bottom of the gully are covered with a thin layer of straw or similar fine mulch, which is slightly countersunk, in order to form a bond between the structure and the soil. Brush with butts Soil & Water Conservation Engineering
43 pointing upstream is next proposed height of the dam. Several rows of stakes are then stakes 30 to 60 cm apart in the rows. The brush fill is then completed and heavy galvanized wire stretched along the rows of stakes and fastened to them. The stakes are then driven down until the wire firmly compresses the brush in place. Large stones are sometimes placed on top of the bottom of the gully. Loose rock dams Where stones or rocks of appreciable size and suitable quality are available, they may be used to make semi-permanent check dams in gullies that have small to medium size drainage areas. To construct the dam, a trench is first made across the gully to a depth of about 30 cm. This forms the base of the dam on which the stones are laid in rows and are brought to the required height. The center of the dam is kept lower than the sides to from the spillway. Plank or slab dams Plank dams or slab dams can generally be used in gullies with somewhat larger drainage areas than in the case of woven wire or brush dams. These dams are suitable in areas where timber is plentiful and can be constructed with much less labour as compared to other types of temporary structures. In building the dam the posts are set in a row across the gully to a depth of about 1 m and about 1.2 m apart. After the pots are set, a narrow trench is dug along their upstream side. The trench is made about 30 cm deep and just wide enough to permit placing of the headwall and a thin layer of straw or grass as a seal. Log and pole dams Log and pole dams are sometimes used. With long and pole there is some difficulty in getting a good bond between the dam and the bottom and sides of the gully. Example: 1. Design the notch dimension of a wooden slab dam to carry a peak flow of 0.6 cu m/sec. The notch has rectangular opening. Width of gully channel is 2.5 m. 2. Design the notch dimension of a wooden slab dam to carry a peak flow of 0.75 cu m/sec. The notch has rectangular opening. Width of gully channel is 3.0 m. II.
Permanent gully control structures
Soil & Water Conservation Engineering
44 Permanent soil conservation structures are built of masonry, reinforced concrete, or earth, utilizing concrete or steel pipe spillway. Permanent structures generally are used in medium to large gullies with medium to large drainage areas. Three basic permanent structures are employed in stabilizing gullies: 1. Drop spillways – They are an efficient structure for controlling relatively low heads, normally up to 3 m. 2. Chute spillways -They are an efficient structure for controlling relatively high heads 3. Drop inlet spillways - They are an efficient structure for controlling relatively high heads, usually above 3 m. K.T.WEIR Kolhapur Type weir is one of the most suitable and common constructed permanent gully control structure. The series of such structures develops a continuous check to the flow of water, causing deposition of sediment. These are constructed with masonry or RRC material. A number of rectangular weirs are provided in the head wall to pass excess runoff water with safe velocity. The main feature of the K.T.weir is that the rectangular weirs are provided with removable metal gates. The purpose of the gates is to avoid the siltation of the structure. The different components of the drop structure are as
Head wall and head wall extension Weirs Side walls Wing walls Apron Longitudinal sills Cut off walls
Weir design 1. Determine the peak rate of runoff by using rational formula. Q = CIA/360, Where,
Q = Peak flow. m3/s C = Runoff coefficient I = Rain fall intensity, mm/hr
Soil & Water Conservation Engineering
45 A = Catchments area, ha 2. Considering the length of the head wall and number of notches to be provided determine (assume) the length of the each weir. 3. The shape of the weirs is rectangular, so using the formula flow through rectangular weir, determine the height of weirs to be kept adding free broad. Example:
Design the weir dimensions for the K.T.weir having the head wall length 20 m. The expected peak flow is 1.8 cu m/sec and the numbers of weirs to be provided are 3.
Draw the typical cross sections of the following structures
Temporary check dams
Permanent check dams
Nala bund
K.T.weir
Soil & Water Conservation Engineering
46
PRACTICAL NO. 15 TITLE: DETERMINATION OF POND CAPACITY Water harvesting term was first used in Australia by H.J. Gedders, to denote the collection and storage of any farm water either runoff or creek flow for irrigation use. In many regions local thumb rules are used for designing the structure. For hydrological design a more or less universal criterion is followed which is basically ‘the ratio of the Catchments area to the cultivated area.’ The most common long-term runoff harvesting structures are of two types as under
Dugout ponds
Embankment type reservoirs.
Where the topography is not suitable for the embankment construction, dug out or excavated pond can be constructed in a relatively flat terrain (Since dug out ponds can be constructed to expose a minimum water surface area in proportion to volume. Advantages: Since the dugout farm ponds can be constructed to expose minimum water surface area in proportion to volume, dug out farm ponds are advantageous where the evaporation losses are high and water is scare. Selection of Site: Some of the important physical features that must be considered in locating dug out site are watershed characteristics, silting possibilities, and topography and soil type. Watershed must be capable of furnishing the annual runoff sufficient to fill the dugout. The low point of a natural depression is often a good location for a dug out pond. Soil at the pond site should not have high rate permeability. It should be easy to dig. -
If the seepage rates are excessive, suitable living may have to be resorted.
-
Soils underlain by limestone, containing crevices, sinks or channels should be avoided.
Soil & Water Conservation Engineering
47 Planning: Excavated ponds may be constructed to almost any shape desired however a rectangular shape is usually convenient. Size of the pond depends upon the catchments area or area contributing runoff soil type and expected runoff into pond. Design: Design of farm pond consists of following parameters: 1.
Site selection
2.
Pond capacity
3.
Design of embankment
4.
Design of mechanical spillway
5.
Design of emergency spillway and
6.
Arrangements for seepage control from bottom of the pond.
Pond Capacity The pond capacity is determined with the help of contour map of the watershed area, where the pond is to be located. From the contour plan of the site, the capacity is computed for different stages, using different area estimating formulae. Trapezoidal or Simpson’s rule is used for the purpose.
Generally,
Simpson’s rule gives more
accurate values than the Trapezoidal rule. For this purpose, using the plainimeter, the area enclosed by each contour is measured. According to the Trapezoidal rule, the volume (V), of two successive contours spaced at an interval (H) with the areas. A1, A2 is given by : H V = ------ (A1 + A2) 2 Similarly, Simpson’s rule states that: H V = ------3
Twice the 4 times the area Sum of area of area of + of even + I st and last odd contours contours contours
The Simpson rule is also known as Prismodal rule. This method has limitation Soil & Water Conservation Engineering
48 that the numbers of contours should be in odd numbers i.e. the number of intervals used, should be even. A depth capacity curve of the pond is also prepared for different water level, using the depth capacity data. This curve helps in deciding a suitable embankment height with respect to the available capacity of the pond. Figure shows the depth capacity curve of the pond. Estimation of volume of pond: Volume of excavation required can be estimated with sufficient accuracy by using Prismoidal formula.
V=
A + 4B + C ------------------ x D 6
Where V = Volume of excavation m
2
2 A = Area of Excavation at the top portion (m ) 2 B = Area of excavation at the mid depth point ( m ) 2 C = Area of excavation at the bottom of pond (m ) and
D = Depth of Pond (metres) Provision of spillway – At the entrance of runoff into the farm pond masonry chute spillway cement pointed (Cement sand 1:3) is adopted Spillway at the outlet – Spillway at the out let should have 1: 25 times the inlet spillway capacity. Out flow from the farm pond should be safely diverted into the grass water way downstream that ultimately joins natural stream. The side slope of dugout pond should not be steeper than natural angle of repose Soil & Water Conservation Engineering
49 of the material being excavated side slopes should be flatter than 1: 1 Disposal of excavated material A beam with a width equal to the depth of pond may be provided. Excavated material should be used to construct bund around the pond to increase the capacity of pond. Example: 1. Calculate the volume of water stored in farm pond given that the area closed by different contours at site as follows. Sr.No.
Contour value (m)
Area enclosed (sq.m.)
1
300
220
2
301
250
3
302
320
4
303
370
5
304
450
6
305
530
7
306
600
Contour interval (H) = 1 m 2. Calculate the volume of excavation required to construct a dugout type farm pond if average depth of the pond is 4.5 m, bottom width and length are 12 m and 25 m respectively with side slopes 2:1
Soil & Water Conservation Engineering
50
PRACTICAL NO. 16 TITLE: VISIT TO WATERSHED Watershed: Watershed can be defined as a unit of area covers all the land which contributes runoff to a common point or outlet and surrounded by a ridge line”. It is also known as catchment area or drainage area. Watershed Management/development Watershed management/development refers to the conservation, regeneration and judicious utilization and management of all natural resources like land, water, vegetation, animals and human being) within watershed, for achieving sustainable crop production and for the well-being of the people. Main Objectives of Watershed Development Project 1) To control damaging runoff and degradation and conservation of soil and water. 2) To manage and utilize the runoff for useful purposes. 3) To protect, conserve and improve the land of watershed for more efficient and sustained production. 4) To protect and enhance the water resources originating in the watershed. 5) To check the soil erosion and reduce the effect of sediment yield on the watershed. 6) To rehabilitate the deteriorating lands. 7) To moderate the flood peaks at downstream areas. 8) To enhance the ground water recharge. 9) To improve and increase the production of timber and wild life resources. 10) To intensity agricultural extension activities. 11) To increase productivity per unit area The watershed development Programme is directly related to socio economic condition of rural peoples. The upliftment of socio economic status of rural people is only the parameter which showing the positive effect of watershed development Programme. The watersheds put under different land uses and land treatment produce different amount of runoff and soil loss. It is therefore essential to determine the efficiency of various soil and water conservation measures in controlling runoff and soil loss. Soil & Water Conservation Engineering
51 Evaluation of watershed development Programme is carried out by comparing the situation between the predevelopment conditions and post development conditions. The visit should be arranged for study of watershed development work (soil and water conservation work) carried out in a watershed project with following objectives i) Observation and technical data collection regarding different agronomical and engineering measures adopted in watershed. (Format) ii) Socio-economic data collection (before and after w/s development project) iii) Impact of soil and water conservation work on ground water recharging (through discussion), irrigated area (actual field visit) and socio-economic conditions of the watershed dwellers. The format should be prepared for each watershed considering following points: Sr.No.
Particulars
1
Rainfall data
2
Runoff produced Basic data i. Area of watershed a. Cultivable land b. Non cultivable land c. Forest land d. Revenue land e. Other land
3
ii. Population a. Male b. Female c. Working population iii. Live stock a. Crossed breed b. Indigenous c. Sheep
Soil & Water Conservation Engineering
Pre watershed
Post watershed
52 d. Goats 4
Milk production
5
Nos. of wells and tube wells
6
Avg.depth of water table below ground level Area under SWC measures Contour bunds
7 Farm bunds Trenches (Contour/staggered) Other measures 8
Check dams Nos. of Temporary C.D. Nos. of Permanent C.D. Nos. Of Nala bunds Nos. of K.T.weir Others Land under irrigation
9
Perennial Seasonal Cropped area Kharif
10 Rabi Summer 11
Avg. yield of crop per unit area
12
Migration for employment
Soil & Water Conservation Engineering
53
Course No.
: ENGG-121
Semester
: II (New)
Degree Course
: B.Sc.(Hons.) Agriculture
Credits: (1+1)=2
INDEX Exercise No.
Name of the Exercise
Page No.
1
General status of soil conservation in India.
01
2
Study of surveying instruments
05
3
Study of leveling instruments.
09
4
Chain triangulation survey.
14
5
Plane table survey.
17
6
Estimation of runoff by rational method.
20
7
Estimation of soil loss (USLE).
23
8
Measurement of soil loss (multi slot divisor).
26
9
Study of grassed waterway.
28
10
Study of graded bunds.
30
11
Study of contour bund and compartmental bunding.
31
12
Study of terraces.
34
13
Study of CCT and staggered trenches.
37
14
Study of gully plug, nala bund, check dams and K.T.Weirs
38
15
Determination of pond capacity.
45
16
Visit to a developed watershed.
49
Soil & Water Conservation Engineering
Date
Sign
54
VASANTRAO NAIK MARATHWADA KRISHI VIDYAPEETH, PARBHANI : 431 402 College of Agriculture, …………………. CERTIFICATE This is to certify that Shri / Miss ……………….……… Reg.No.……………............…… a student of IInd (New) Semester, B.Sc. (Hons.) Agriculture has completed all the exercises successfully for the Course : Soil and Water Conservation Engineering, Course No. : ENGG - 121, during Summer Semester 201 - 201
Place : Date :
Remarks :
Soil & Water Conservation Engineering
COURSE TEACHER
55
VASANTRAO NAIK MARATHWADA KRISHI VIDYAPEET, PARBHANI COLLEGE OF AGRICULTURE, ....................
PRACTICAL MANUAL ON
Soil and Water Conservation Engineering Name of the student:______________________ Registration No.
:______________________
Course No.
: ENGG-121
Semester
: II (New)
Degree Course
: B.Sc.(Hons.) Agriculture
Academic Year
: 201 - 201
Compiled by : Prof. B.P.Sawant & Dr. R.G. Bhagyawant Under the Guidance of Dr. U.M. Khodke, HOD, DEPARTMENT OF AGRICULTURAL ENGINEERING V.N.M.K.V., PARBHANI Soil & Water Conservation Engineering
Related Documents

2
March 2021 0
2
February 2021 0
2
January 2021 3
2
January 2021 3
2
February 2021 2
2
February 2021 0More Documents from "Instituto Bautista Van Schouwen"

Lesson 9 - Comparison Of Alternatives
January 2021 1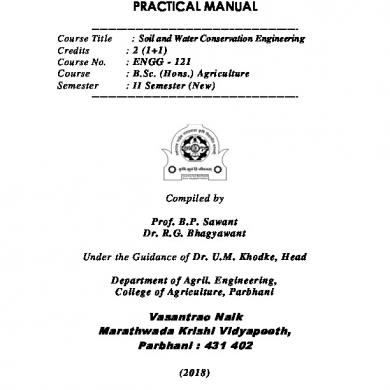
Engg-121 (2)
February 2021 1
Analisis-de-estructuras-mccormac-4ta-edi.pdf
March 2021 0
Operatoria Dental Arte Y Ciencia - Sturdevant
March 2021 0
Jec-cist-ficha De Registro De Fallas.docx
February 2021 1