Main Ten Com
This document was uploaded by user and they confirmed that they have the permission to share it. If you are author or own the copyright of this book, please report to us by using this DMCA report form. Report DMCA
Overview
Download & View Main Ten Com as PDF for free.
More details
- Words: 10,315
- Pages: 83
Loading documents preview...
MNT MITSUBISHI ELENESSA VFGL Maintenance Documentation EU_K42524400_EN_00 Version 09-2016
Prepared Reviewed Norms checked Released Changed: KA number: KA date:
munozra gamazoan adlerto feenstjo
29.09.16 30.09.16 11.05.17 15.05.17
Responsible department
Classification
EIM
10100
Document owner INVENTIO AG, CH-6052 Hergiswil
00 252111 27.05.2017
Copyright © 2017 INVENTIO AG All rights reserved. INVENTIO AG, Seestrasse 55, CH-6052 Hergiswil owns copyrights and other intellectual property rights of this manual. It must only be used by authorized SCHINDLER personnel or SCHINDLER representatives for the exclusive purposes of SCHINDLER. Any reproduction, translation, copy or storage in data processing units, made in any form or by any means without the prior approval of INVENTIO AG, shall be considered a rights violation and prosecuted legally.
Copyright © 2017 INVENTIO AG
K42524400_EN_00
2
Table of Contents 1.
2. 3.
4.
5.
General information ...................................................................................................................................................... 5 1.1 Introduction ......................................................................................................................................................... 5 1.2 Safety Tips .......................................................................................................................................................... 6 1.3 Electrical hazards ................................................................................................................................................ 7 Identification of the model ........................................................................................................................................... 8 2.1 Machine ............................................................................................................................................................... 9 Tools ............................................................................................................................................................................. 10 3.1 Landing operating panel HMI ............................................................................................................................ 10 3.2 Car operating panel HMI ................................................................................................................................... 11 3.3 Control cabinet HMI ......................................................................................................................................... 12 3.4 Bridging panel ................................................................................................................................................... 13 3.5 Brake opening control panel ............................................................................................................................. 14 Description of the controller circuits ........................................................................................................................ 15 4.1 KCD 91X board ................................................................................................................................................. 15 4.2 KCR910 board .................................................................................................................................................. 16 4.3 KCA 92X board ................................................................................................................................................. 17 4.4 KCA-91X board ................................................................................................................................................. 18 4.5 KCA-915X board ............................................................................................................................................... 19 4.6 KCR-99XB board .............................................................................................................................................. 20 4.7 DOR-123XA board ............................................................................................................................................ 21 4.8 LHD-73XA board ............................................................................................................................................... 22 Maintenance................................................................................................................................................................. 23 5.1 Maintenance operating panel ............................................................................................................................ 23
Copyright © 2017 INVENTIO AG
K42524400_EN_00
3
6. 7.
8.
9.
5.2 Recall control panel........................................................................................................................................... 24 5.3 Control cabinet door contacts ........................................................................................................................... 25 5.4 Car operating panel removal ............................................................................................................................. 26 5.5 Car out of order ................................................................................................................................................. 28 5.6 Car pulleys ........................................................................................................................................................ 29 5.7 Overspeed governor ......................................................................................................................................... 30 5.8 Safety gear GSB-251 ........................................................................................................................................ 32 5.9 Car Guide shoes ............................................................................................................................................... 33 5.10 Car anchoring .................................................................................................................................................... 34 5.11 Safety gear test ................................................................................................................................................. 35 5.12 Final limit switches test ..................................................................................................................................... 37 Hoistway information .................................................................................................................................................. 39 Machine ........................................................................................................................................................................ 45 7.1 Maintenance ...................................................................................................................................................... 46 7.2 Brake adjustment .............................................................................................................................................. 51 7.3 Static full brake test ........................................................................................................................................... 52 7.4 Static half brake test.......................................................................................................................................... 54 7.5 Dynamic brake test ........................................................................................................................................... 55 Diagnostic .................................................................................................................................................................... 58 8.1 HMI LEDs .......................................................................................................................................................... 58 8.2 HMI display ....................................................................................................................................................... 59 8.3 See errors ......................................................................................................................................................... 60 Rescue of Trapped Passengers ................................................................................................................................. 78
Copyright © 2017 INVENTIO AG
K42524400_EN_00
4
1. 1.1
General information Introduction
This document addresses some of the maintenance tests for the following equipment: Mitsubishi manufacturer, Elenessa VFGL model / controller, rated speed 1 m/s or less. Important This quick reference does not claim to include all possibilities. In every case, the service technician has to read, understand and follow the instruction. Read the customer documentation first to be sure you perform the right procedure. The description contained in the customer document shall always have priority! Prior requirements – First-level training describing the Elenessa VFGL controller. – First-level training troubleshooting the Elenessa VFGL. Additional Information Course Documentation
Copyright © 2017 INVENTIO AG
Technical Competence Center. On demand courses. Generic Guidelines on How to Test Safety Elevator Components
K42524400_EN_00
5
1. 1.2
General information Safety Tips Safety instructions Exclusively for competent professionals. Before starting work, consult and follow the latest safety manual as well as all local safety requirements. Personal Protective Equipment: − Always use and correctly maintain the listed personal protective equipment. − Immediately replace damaged or lost personal protective equipment.
WARNING The safety warning with the word "Warning" is used to indicate a hazardous condition which, if not prevented, could result in serious injuries and even death. NOTICE The security warning with the word "Notice" is used to refer to practices that could cause property damage but no injuries.
Safety warnings used in this manual Auxiliary Equipment DANGER The safety warning with the word "Danger" is used to indicate a hazardous situation which, if not avoided, will result in death or serious injury.
Copyright © 2017 INVENTIO AG
Auxiliary equipment that does not meet the manufacturer's requirements could affect safety and cause accidents. ► Use materials approved by Schindler.
K42524400_EN_00
6
1. 1.3
General information Electrical hazards DANGER
Hazardous voltage Contact with live components will cause an electric shock, which can result in serious injuries and even death. Do not touch live parts. Disconnect the main switch and shut down the power for the installation before starting to work on it. WARNING Bypassing of Safety Devices and Safety Contacts Bypassing safety devices can cause damage to the installation, serious physical injury or even death. Do not bypass the safety circuit without explicit instruction. If bypassing is premeditated for specific work: Take appropriate safety measures. Do not bridge the safety devices when local regulations expressly prohibit it. If safety devices are bypassed: Disable the installation.
Copyright © 2017 INVENTIO AG
NOTICE Plugging / unplugging connectors on devices with current (hot plugging) Hot plugging can result in the destruction of devices. Switch off the devices before plugging in or unplugging connectors.
NOTICE Components sensitive to electrostatic discharge (ESD) ESD sensitive components will be destroyed if exposed to electrostatic discharge. If handling ESD-sensitive components: Adhere to ESD-safe procedures.
K42524400_EN_00
7
2.
Identification of the model
This elevator model is installed without a machine room. There is an HMI behind the landing operating panel on the top floor and the rest of the controller is in the hoistway.
Hoistway controller cabinet Copyright © 2017 INVENTIO AG
HMI behind top floor operating panel K42524400_EN_00
8
2. 2.1
Identification of the model Machine Machine Such facilities can consist of various models depending on the characteristics of the installation. We are familiar with two models: 1- PMF-3P7S-6P5S 2- PMF-011-S The two are gearless machines with synchronous motors, which have a stator with very shallow depth.
PMF-011-S machine Copyright © 2017 INVENTIO AG
K42524400_EN_00
9
3. 3.1
Tools Landing operating panel HMI Main HMI (Human-Machine Interface) Behind the landing operating panel on the top floor, the LHH-320A circuit is located; this circuit has four rotary switches, three switches, and three displays. With these elements, it is possible to perform fault diagnostics, operating tests, and programming system settings.
The manufacturer calls this circuit the HIP (Hall Inspection Panel)
In normal operation mode, the rotary switches must be in the following positions: SET0 = 8 SET1 = 0 MON0 = 0 MON1 = 8
HMI behind top floor button panel Copyright © 2017 INVENTIO AG
K42524400_EN_00
10
3. 3.2
Tools Car operating panel HMI Car operating panel HMI The LHS-420A circuit is located behind the main car operating panel. It is possible to perform various tests from this element.
In normal operation mode the rotary switches must be in the following positions: SET0 = 8 SET1 = 0
Car operating panel HMI
Copyright © 2017 INVENTIO AG
K42524400_EN_00
11
3. 3.3
Tools Control cabinet HMI Controller HMI On the P1 controller board, located in the control cabinet in the hoistway, there is an HMI that allows diagnosing and configuring the controller. It consists of four rotary switches, three displays, and 5 switches.
In normal operation mode, the rotary switches must be in the following positions: SET0 = 8 SET1 = 0 MON0 = 0 MON1 = 8
P1 Controller board HMI Copyright © 2017 INVENTIO AG
K42524400_EN_00
12
3. 3.4
Tools Bridging panel Bridging panel At the bottom of the HMI of the landing operating panel, there are two connectors, the HTA and HTB. The bridging operating panel is connected here, which permits performing certain maintenance tests speedily and with ease.
Bridging panel
HTA and HTB connector
Copyright © 2017 INVENTIO AG
K42524400_EN_00
13
3. 3.5
Tools Brake opening control panel Brake opening control panel In case of need to adjust the brake, to change the lining or because of excesive wear of the lining, it is convenient to have a control panel that allows opening the brake independently of the controller.
BKCM
This tool plugs into the terminal box of the machine and is operational only when the anchoring system of the elevator car is activated.
The tool only has two buttons to open the brakes and a connection cable.
BKCK
Brake opening button panel
Copyright © 2017 INVENTIO AG
K42524400_EN_00
14
4. 4.1
Description of the controller circuits KCD 91X board KCD-91X board The KCD91X control board has the main microcontroller. It is the "brain" of the controller. This board is designated in the wiring diagrams as P1. It is located in the control cabinet, which is at the top of the hoistway.
There are various models of P1 boards, depending on the characteristics of the installation. We do not know what are the differences between the boards. P1 circuit models: KCD-910 KCD-911 KCD-912 KCD 91X, P1 board Copyright © 2017 INVENTIO AG
K42524400_EN_00
15
4. 4.2
Description of the control circuit KCR910 board KCR-910 board This is the board responsible for generating the control signal of the IGBT, both the ones controlling the traction motor as well as the machine brake. This board is shown in the wiring diagrams as E1. It is located in the control cabinet, which is found at the top of the hoistway. Specifically, it is located on the hinged cover of the control panel.
KCR 91X, E1 board Copyright © 2017 INVENTIO AG
K42524400_EN_00
16
4. 4.3
Description of the control circuit KCA 92X board KCA-92X board This is the board that supports the different installation options, such as the fireman mode, fire mode, emergency mode, ... Hence, it does not have to be always present in the controller. This board is designated in the wiring diagrams as Z1. It is located in the control cabinet, which is found at the top of the hoistway. Specifically, it is located on the hinged cover of the control panel.
KCA 92X, Z1 board
Copyright © 2017 INVENTIO AG
There are various models of the Z1 board, depending on the installation characteristics. We do not know what the differences are between the boards. Z1 boards: KCA-920 KCA-921 KCA-922 KCA-923
K42524400_EN_00
17
4. 4.4
Description of the control circuit KCA-91X board KCA-91X board This board is an interface between the P1 circuit and the rest of the installation. It is primarily a set of connections of the installation and voltage adjustment elements. This board is designated in the wiring diagrams as R1. It is located in the control cabinet, which is at the top of the hoistway. There are various models of R1 boards, depending on the installation characteristics. R1 circuit models: KCA-910: The safety series bridging circuit is located on a different board. KCA-911: The safety series bridging circuit is integrated on the same circuit.
KCA 91X, R1 board Copyright © 2017 INVENTIO AG
K42524400_EN_00
18
4. 4.5
Description of the control circuit KCA-915X board KCA-915X board This is the board tasked with bridging the safety series bridge when the installation is equipped with doors pre-opening. This board is designated in the wiring diagrams as R2. It is installed on the KCA-910 (R1) circuit.
KCA 915X, R2 board
Copyright © 2017 INVENTIO AG
K42524400_EN_00
19
4. 4.6
Description of the control circuit KCR-99XB board KCR-99XB board This board measures the elevator car load, as well as the temperature present in the hoistway.
In installations with a 2:1 roping system, it is located next to the ropes suspension points, on top of the hoistway.
KCR-99X board,
Copyright © 2017 INVENTIO AG
K42524400_EN_00
20
4. 4.7
Description of the control circuit DOR-123XA board DOR-123XA board This board controls the elevator car door motor. It is the door motor frequency converter This board is located on the elevator car roof. It has a set of jumpers that allows adjusting the operation of the door.
KCR-99X board,
Copyright © 2017 INVENTIO AG
K42524400_EN_00
21
4. 4.8
Description of the control boards LHD-73XA board LHD-73XA board This board is the interface with the elevator display. It has two rotary switches whose function we do not know.
LHD 73XA board Copyright © 2017 INVENTIO AG
K42524400_EN_00
22
5. 5.1
Maintenance Maintenance operating panel To move the installation in one direction, press the common button (C) and the one of the desired direction. NORMAL
INSPECTION
To open and close the main doors, press the CFX CS button and the button to open (open) or close the doors (close).
1 2 3 4 5 6 7 8
Inspection switch Stop button Common to open and close the main entrance. Common up / down Up button Down Button Open doors button Close doors button
Maintenance operating panel
Copyright © 2017 INVENTIO AG
K42524400_EN_00
23
5. 5.2
Maintenance Recall control panel The recall control panel is located behind the landing operating panel of the last stop. It is a set of buttons and switches to help in maintenance tasks. 1 2 3 4 5 6
7
8 9 10 Recall control panel
11
Copyright © 2017 INVENTIO AG
Stop button. Main installation switch. Recall control panel common Switch to block the car doors opening Recall travel mode up button. Switch to bridge safety gear contact and final limit switches when the system is in recalll mode. The recall downwards button to move the elevator in recall travel mode in the downward direction. Installation recall mode recall switch. Rescue operation switch. Open brake button when the rescue switch is On. HMI light switch.
K42524400_EN_00
24
5. 5.3
Maintenance Control cabinet door contacts The control cabinet, located inside the hoistway, has four parts. Two of them have hinged doors, with an associated switch. When the electrical panel door is open, the car cannot move. If the car moves with the door open, there is a high probability that the car will collide with the control panel doors, causing serious damage to the installation. 1
Hinged cover, containing transformer and batteries.
2
Hinged cover, containing the frequency converter and controller Sliding cover, main switches. Screw cover, cable entry.
3 4 Microswitch
Hoistway control cabinet
Copyright © 2017 INVENTIO AG
K42524400_EN_00
25
5. 5.4
Maintenance Car operating panel removal To remove the car operating panel, the first thing we have to do is open the door located in its lower part. This door allows access to two screws, which permit removing the car operation panel when removed.
1
Key lockable door
Car operating panel
Copyright © 2017 INVENTIO AG
K42524400_EN_00
26
5. 5.4
Maintenance Car operating panel removal In the bottom of the car operating panel housing, there is a plate that eases keeping the button box open securely (so that it cannot fall). Remove the mounting plate, place the plate at 90° and screw the mounting plate between the car operating panel and the screws located on the edge of the button panel housing.
1
1 Car operating panel
Copyright © 2017 INVENTIO AG
Plate to secure the button panel when it is open.
K42524400_EN_00
27
5. 5.5
Maintenance Car out of order To place the car in "out of order" mode, follow the procedure below: Press the door opening button and the floor where the car is located. The button must be pressed for more than 5 seconds.
To reset the installation to normal, repeat the above operation. Press the door opening button and the floor where the car is located. The button must be pressed for more than 5 seconds.
Car operating panel Copyright © 2017 INVENTIO AG
K42524400_EN_00
28
5. 5.6
Maintenance Car pulleys This type of installation has always 2:1 roping system. Pulleys located under the car must be lubricated periodically.
2
1
Car pulleys
1 2
Copyright © 2017 INVENTIO AG
Pulley lubrication point. Pulley lubrication point.
K42524400_EN_00
29
5. 5.7
Maintenance Overspeed governor The DG model overspeed governor is manufactured by Mitsubishi. It is a centrifugal jaw governor.
1 2
3
4 5 6
1 Governor activation electrical contact. 2 Mechanical element that moves to activate the governor. 3 Steel towline that is pulled to activate the limiter remotely. 4 Steel towline that is pulled to rearm the limiter contact remotely. 5 Label indicating the limiter characteristics. 6 When the car is moving down, the limiter pulley must rotate in that direction.
Car operating panel
Copyright © 2017 INVENTIO AG
K42524400_EN_00
30
5. 5.7
Maintenance Overspeed governor The following points must be checked periodically:
1 The centrifugal mechanism should be able to move smoothly. This element has a spring that must be sealed. 2 The mechanism with the pressure spring on the cable must be able to move. Moving this element requires some force, so that moving it activates the electrical contact. 3 Move the towline; the movement must be smooth in order to allow it to be remotely activated easily later. 4 Move the towline; this movement resets the electrical contact remotely. 5 The rated speed of the car must match that of the installation. Show that it is indicated in meters per minute. Thus an installation of 1 m/s indicates a RATED SPEED of 60 m/min. Overspeed governor
Copyright © 2017 INVENTIO AG
K42524400_EN_00
31
5. 5.8
Maintenance Safety gear GSB-251 Check that the safety gear box is positioned as shown in the drawing. The moving part of the wedges box must move without any resistance and in a smooth manner.
4 mm
1 Spring washers. 2 Rollers facilitating the movement of the wedge. 3 Moving part of the safety gear box. 3±1 mm
1
2 3 Safety gear box Copyright © 2017 INVENTIO AG
K42524400_EN_00
32
5. 5.9
Maintenance Car Guide shoes The car must have clearance between the guide and the guide shoes of less than 2 mm.
C1
C2 Car shoes condition
l C1-C2 l < 2 mm
Copyright © 2017 INVENTIO AG
K42524400_EN_00
33
5. 5.10
Maintenance Car anchoring In the car there is a locking system, which can be anchored at two different heights, depending on whether work is to be carried out on the controller (located in the hoistway) or on the traction machine. This system has a contact that prevents the car from moving when the anchor system is activated. If the anchoring system is activated and it cannot be turned off, use the following procedure. To lower the car with active anchor: - Simultaneously press the buttons CFX SC - C - DOWN. To raise the car with active anchor: - Simultaneously press buttons CFX SC - C - UP.
Copyright © 2017 INVENTIO AG
1
Anchoring for working on the machine.
2
Anchor for working on the controller.
K42524400_EN_00
34
5. 5.11
Maintenance Safety gear test DANGER
Before starting these safety element tests, check the correct condition of the safety gear and its levers and linkages. Use as a reference the original diagram of the installation; if they are not in your possession ask them from the service leader. The inspection points in this manual have been obtained from generic diagrams which are not necessarily the same in all installation types.
Step 1 2 3
4 5 6 7
Description Call the elevator from the last floor and check that no one is in the car. Access the HMI located behind the landing operating panel on the last floor. When the car door closes, activate the recall control panel mode (HAND) and move the car down by about 1.5 m. Move the car down while pulling the steel towline that activates the overspeed governor. To pull the towline, use universal pliers, while the other hand holds the towline sheath (must be activated smoothly). For this action there is a tool that is not usually present in the installation. The car stops due to the activation of the overspeed governor.
Activate the ED SW contact found on the HMI, and move the car down with the recall panel. The traction pulley slips under the cables. (do not continue this action for more than 3 seconds) Turn off the ED SW contact and try to move the car up with the recall panel. The car does not move once the safety gear contact is activated. Activate the ED SW contact and move the car upwards to recover the safety gear. Place the ED SW contact in the OFF position and the recall panel to normal (AUTO). LED 29 does not turn ON because the speed governor contact is activated.
Copyright © 2017 INVENTIO AG
K42524400_EN_00
35
5. 5.11 Step 8 9
Maintenance Safety gear test Description Activate the recall panel (HAND) and reset the limiter contact; pull the towline provided for this purpose. Pull on the rope with universal pliers while holding the cable sheath in the other hand. Place the recall panel in normal mode (AUTO) and check the operation of the installation.
Copyright © 2017 INVENTIO AG
K42524400_EN_00
36
5. 5.12
Maintenance Final limit switches test DANGER
Before starting these checks of the safety elements, ensure there is an adequate distance between the counterweight and buffer when the car is on the top floor. Use as a reference the original diagram of the installation; if it is not in your possession, get it from the service leader. The checking points in this manual have been obtained from generic diagrams which are not necessarily the same in all installation types. Step 1 2 3
Description Call the elevator from the last floor and check that no one is in the car. Access the HMI located behind the landing panel on the last floor. Once the car door is closed, activate the recall panel (HAND) and block the door opening with the DOOR switch. On the HTB connector on the HMI, bridge points 1A - 4A (USR) and 1A - 2A (UL). Thus, the upper limit forced slow down switch (USR) and the upper limit switch (UL) are disabled. These bridges can be made by means of the work control panel provided with these functions.
4 5 6 7 8
Move the car upwards with the recall panel, passing the car through the floor level. Return the installation to normal, LED 29 is off, indicating that the UOT end of travel is open. Remove the bridges made on the HTB connector. Activate recall (HAND) and the ED SW switch, move the car down 50 cm. Turn off ED SW, activate DOOR, place the recall panel on normal (AUTO).
Copyright © 2017 INVENTIO AG
K42524400_EN_00
37
5. 5.12 Step 9 10
Maintenance Final limit switches test
11 12
Description Call the elevator from the last floor and check that no one is in the car. Send the elevator to the lowest floor of the installation. When the car starts moving deactivate the doors opening with the DOOR switch. When the car reaches the lowest level, activate the recall panel (HAND). On the HTB connector located on the HMI, bridge points 1A - 4B (DSR) and 1A - 2B (DL). In this manner the down limit forced slow down switch (DSR) and the down limit switch (DL) are disabled. These bridges can be made by means of the Bridging panel provided with these functions.
13 14 15 16 17 18
With the recall panel, move the car downwards through the complete travel. Place the installation to normal, LED 29 is off, indicating that the DOT end of travel is open. Remove the bridges made on the HTB connector. Activate recall (HAND) and the ED SW switch, move the car up 50 cm. Turn off ED SW, activate DOOR, place the recall panel on normal (AUTO). Check the correct operation of the installation.
Copyright © 2017 INVENTIO AG
K42524400_EN_00
38
6.
Hoistway information
The installation is provided with two types of hoistway information: - Car hoistway information, where all the elements that detect the position of the car in the hoistway are located. - Hoistway information mounted on the car guide rail both at the top and bottom of the hoistway. Information in the car - Two magnetic sensors inform the door zone to the controller. If the installation has double entrance there would have to be two additional magnetic sensors. - Two optical sensors allow pre-opening of doors as well as re-levelling. Magnetic car sensors: The sensor is supplied with a 12 Vdc voltage and is threaded through a metal plate that drives the activation of the inner Reed bulb. The sensor should be centered when threaded through the plate. The magnetic sensors are called DZU and DZD.
Magnetic sensor
Copyright © 2017 INVENTIO AG
K42524400_EN_00
39
6.
Hoistway information
The following hoistway information plates for activation of the magnetic sensors are located at the floor level.
Copyright © 2017 INVENTIO AG
K42524400_EN_00
40
6.
Hoistway information
Section A B C
Function
Door zone
Measurement 145 mm 275 290 mm
C: Door zone. Optical car sensors: The system has two optical sensors that indicate to the car it can perform leveling. These sensors are mounted so that when the car is located in the right zone, the beam of infrared light bounces and the light reaches the receiver. Emitter These sensors are called RLD and RLU. The optical sensors have two LEDs, one green indicating that the sensor has power and the other red indicating it is in front of a plate. Receiver When the metal plate is coated with a layer of black rubber, the light signal does not bounce, whereas if the plate does not have the rubber layer, the light signal does bounce. In the door zone, the plate is not coated, and therefore the light signal bounces.
Copyright © 2017 INVENTIO AG
K42524400_EN_00
41
6.
Hoistway information When the car is at floor level the optical sensors RLU and RLD are active. If the car moves up or down, one of the two sensors will no longer be active.
Copyright © 2017 INVENTIO AG
K42524400_EN_00
42
6.
Hoistway information
Fixed hoistway information A series of mechanically activated contacts attached to the car guide are located at the top of the hoistway. The car has an inclined plate that will activate the contacts when the car is at the level of the contacts.
1 2 3 4
Upper travel limit, triggers the safety series. Upper limit switch. Upper limit forced slow down switch Up Speed Reduction Switch
Lower fixed information
Copyright © 2017 INVENTIO AG
K42524400_EN_00
43
6.
Hoistway information
Fixed hoistway information A series of mechanical contacts attached to the car guide are located at the bottom of the hoistway. The car has an inclined plate that will activate the contacts when the car is at the level of the contacts.
1 2
Down Speed Reduction Switch Lower limit forced slow down switch
3 4
Lower limit switch. Lower travel limit, interrupts the safety series.
Upper fixed information
Copyright © 2017 INVENTIO AG
K42524400_EN_00
44
7.
Machine
The traction machine is a gearless machine with synchronous motor. The machine brakes are located inside the rotor, thereby reducing the space occupied by the machine as the brakes are not located on the outside of the stator, as is the case with other manufacturers.
Traction machine Copyright © 2017 INVENTIO AG
K42524400_EN_00
45
7. 7.1
Machine Maintenance
Traction machine Traction machine lateral view Copyright © 2017 INVENTIO AG
K42524400_EN_00
46
7. 7.1
Machine Maintenance
Point 1 2 3 4
Description Motor stator Permanent magnets distributed along the rotor. Metallic element with the lining that presses on the rotor inside, arresting its movement. When excited the coil attracts the metal element that will open the brake.
Brake anchor bolts The main brake assembly bolts are marked in order to verify that they have not changed position. Therefore, they must be checked regularly:
Allen bolt with mark
Copyright © 2017 INVENTIO AG
K42524400_EN_00
47
7. 7.1
Machine Maintenance
Lubrication verification The machine has two covers that can be removed easily.
1
Remove the machine covers 2
4 3 5
6
Copyright © 2017 INVENTIO AG
K42524400_EN_00
48
7. 7.1
Machine Maintenance
Point 1 2 3 4 5 6
Point 1 2 3 4 5
Description Lubrication point. Machine absolute encoder Black rubber tube. Drainage tube (transparent) Drainage tube (transparent) Lubrication tank.
Description Remove the machine covers. Check that there is no grease in the drain pipes (transparent tubes). These tubes must not contain grease. If this is the case, there is the possibility that this grease has reached the brake mechanism and will thus reduces the braking force. Check the grease/oil tank located under the machine. Clean if necessary, as oil / grease may escape through the black rubber tube. When replacing the machine covers be careful that these do not press on the tubes.
Copyright © 2017 INVENTIO AG
K42524400_EN_00
49
7. 7.1
Machine Maintenance
Machine lubrication The machine should be lubricated every two years; for this purpose, a grease pump and grease canister No. 25 from Mitsubitshi are required. After sending a request to the Mitsubitshi distributor (in Spain is Fain), the following product was sent: - Superplus Complex Tech grease. The amount of grease depends on the type of machine: PMF-3P7S/6 P5S 120 g PMF-011-S 200 g
Point 1 2 3 4 5
Description Open the machine cover. Remove the lubrication screw. Screw the grease pump in. Make a mark on the perimeter of the rotor. Enter 1/4 of the total amount of grease and turn the machine 180º. Repeat this four times to insert all the grease needed by the machine.
Copyright © 2017 INVENTIO AG
K42524400_EN_00
50
7. 7.2
Machine Brake adjustment
To adjust the braking distance, the following tools are required: - Two dial indicator gauges. - Control panel for opening the brake individually. The two dial gauges are placed between the outer casing of the machine and the end of the core attracted by the coil. Anchor the car and open the brake coil with the tool for this purpose, and check that the brake release is: Machine Type PML-F037EB PML-F110EB PML-F065EB Gap measurement range Optimal measure
0.16 mm…0.20 mm 0.18 mm
0.19 mm…0.23 mm 0.21 mm
The brake KB contacts must only be adjusted in case of replacing the brake lining, otherwise there is usually no need to change them. Situation
After replacing the brake lining
Control during maintenance
Maximum without activating the contact Minimum without activating the contact
0.15 mm 0.12 mm
0.18 mm 0.10 mm
The contacts that check the brake position (KB) should be activated, at the latest, 1.5 sec. after the voltage is applied to the brake coils. Otherwise the controller will fail.
Copyright © 2017 INVENTIO AG
K42524400_EN_00
51
7. 7.3 Step 1 2 3 4 5 6 7
Machine Static full brake test Description Call the car from the top level and ensure that no-one is in the car. On the main car panel, place the rotary switch SET1 = 0 and SET0 = 1. These are located on the LHS-420X panel of the car operating panel (COP). Press the SW1▼ switch to activate the menu and exit the car. The car display indicates A■1 three times and then indicates ■ 0. Once the doors are closed, block the doors opening with the switch DOOR (HMI behind landing operating panel on the top floor), set it to OFF. Place the elevator in manual (HAND) and press the RUN and UP buttons from the HMI control panel which is located on the top floor. The motor attempts to move up (after 2 sec. pressing), but as the brake does not open a noise comes from the machine. After 5 sec. trying to move the machine test is completed. After 6 sec., the display of the HMI control panel a number is displayed. The decimal point of each display will indicate information. (The outside display also shows the number sequentially). In this example the number 80 is shown, not having any decimal point on any display.
In this example the number 167 is shown, with the decimal point of the display active (SEG1).
Copyright © 2017 INVENTIO AG
K42524400_EN_00
52
7. 7.3 Step
Machine Static full brake test Description
7
8
In this example the number 288 is shown, with the decimal points of the SEG1 and SEG2 displays active.
Turn the car to AUTO mode from the HMI control panel and enable the car doors. Access the car and place the rotary SET0 = 8 and SET1 = 0, located on the LHS-420X board of the COP. Then press SW1▼ twice to exit the settings mode (the car display shows A ■ 8 then the display will show the floor where the car is located).
The value obtained in this test must be greater than 180. If it is less, perform the static half brake test. If the static half brake test is correct, then the static brake tests will be correct.
Copyright © 2017 INVENTIO AG
K42524400_EN_00
53
7. 7.4 Step 1 2 3 4 5
Machine Static half brake test Description
7
Call the elevator from the top floor control panel and check that no one is in the car. Let the car doors close, turn on the recall panel and position the roof of the car at floor level of the last floor. On the outside HMI, the SET rotary switches will be set to: SET1 = 0 and SET0 = 8. On the outside HMI, place the rotary switches MON1 = 0 and mon0 = 3 and press the switch SW1 ▼ twice. With the recall panel, attempt to move the car upwards for 45 seconds. The HMI display will indicate a capital "B". Contactor 5 goes in and out intermittently, while LED 5 can be seen turning on and off on the external HMI. With the recall panel, attempt to move the car downwards for 45 seconds. The HMI display will indicate a capital "B". Contactor 5 goes in and out intermittently, while LED 5 can be seen turning on and off on the external HMI. During tests, if the car moves at a speed higher than 0.03 m / sec, the HMI will indicate an "E".
8
In addition to verifying the HMI symbol, make sure the car has actually moved.
6
9
If the car actually moves more than allowed, check the brake, check that there is no oil or grease on the brake drum, check the marks of the fastening bolts. 10 To exit the test, turn the HMI rotary switches to the normal position, and press the SW1 ▼ switch twice: SET0 = 8, SET1 = 0, MON0 = 0, MON1 = 8 Place the installation in normal mode and enable the opening of doors. If defects are found in the brakes and are later fixed, repeat the above tests. If the brakes are checked and no problems to be corrected are uncovered, contact your service leader.
Copyright © 2017 INVENTIO AG
K42524400_EN_00
54
7. 7.5 Step 1 3 4 5 6 7 8 9 10
Machine Dynamic brake test Description Call the car from the top level and ensure that no-one is inside. Access the LHS-420X circuit located behind the main car operating panel (COP). Place the rotary switches SET1 = 0 and SET0 = B, and press SW1▼. Leave the car and wait for the doors to close. Place the installation in recall mode (HAND). Cancel the door opening via the switch DOOR on the HMI control panel. Using the recall panel, move the car 4 m. down (approx.), its speed is 0.75 m/sec. Move the car upwards with the recall panel (HAND). The car moves up, and will stop automatically when the hoistway information mechanical contact 1USD is activated. The external HMI displays show a value; take note of this. In this example the number 80 is shown, not having any decimal point on any display.
In this example the number 167 is shown, with the decimal point of the display active (SEG1).
Copyright © 2017 INVENTIO AG
K42524400_EN_00
55
7. 7.5 Step
Machine Dynamic brake test Description
10
11 12
13 14
In this example the number 288 is shown, with the decimal points of the SEG1 and SEG2 displays active.
Repeat steps 8, 9 and 10 twice more (three measurements in total) and make an average of the values obtained. The value obtained must be less than indicated in the table below, taking into account the machine type and the maximum load of the car. If this is not the case, the braking force is inadequate and the brake must be checked. Place the recall panel in normal mode (AUTO), call the car from the outside landing operating panel and enable door opening. Turn the COP rotary switches to the normal position (SET0 = 8 SET1 = 0) and press the SW1 ▼ switch twice. Thus, we leave the test mode and the installation is placed in normal mode.
Copyright © 2017 INVENTIO AG
K42524400_EN_00
56
7. 7.5
Machine Dynamic brake test Machine model PMF-3P7S-6P5S
PMF-011-S
Load in kg 450 545 550 610 630 545 550 610 630 700 750 800 825 885 900 950 1000 1050
Static brake test 153 or less 141 or less
143 or less
135 or less
128 or less
If the value obtained is larger than the suitable value, please report this to the service leader.
Copyright © 2017 INVENTIO AG
K42524400_EN_00
57
8. 8.1
Diagnostic HMI LEDs
5
On the HMI (behind the control panel on the top floor) of the controller, there is a set of LEDs that aids in diagnosing faults in the installation.
29 41DG DZ 420
LED 5 29 41DG DZ 420
Function Lights on when contactor 5 is turned on; this means the voltage is supplied from the frequency converter to the machine. Checks the static contacts of the safety circuit of the installation, that means, all those contacts that are closed in normal operation. Checks the contacts of the exterior doors and car series. Indicates that the car is located in the door zone. It lights when the elevator is ready for normal operation.
Copyright © 2017 INVENTIO AG
K42524400_EN_00
58
8. 8.2
Diagnostic HMI display When the installation is in normal mode, the three HMI displays show:
D3 D2 D1 D1: Each segment indicates a controller action. D2 and D1: Floor level on which the car is located.
1 2 3 4 5 6 7
The car is ascending or has an up command. Opening car doors or already opened. Static safety circuit ok (LED 29) Phase-sequence detection Order to operate in manual and automatic mode (LED 5). Closing car doors or already closed. The car is descending or has down command.
Display 3
Copyright © 2017 INVENTIO AG
K42524400_EN_00
59
8. 8.3
Diagnostic See errors The outside HMI has a set of rotary switches and displays that allow us to set the parameters of the installation and troubleshooting. In normal operation the rotary switches must be in the following condition: SET0 = 8 SET1 = 0 MON0 = 0 MON1 = 8
1 2 3 4 5 6 7
Display 1 Display 2 Display 3 MON0 rotary switch MON1 rotary switch SET0 rotary switch SET1 rotary switch
LHH-32XA board on HMI
Copyright © 2017 INVENTIO AG
K42524400_EN_00
60
8. 8.3
Diagnostic See errors
To view the installation errors, turn the HMI rotary switches (landing operating panel box) to: 1 Place the rotary MON0 to 0. 2 Place the rotary MON1 to 1 or 5. 1: Current status of the installation. 5: Condition when the error occurred. Note: The other rotary switches are in normal condition: SET0 = 8 and SET1 = 0.
Now change the value of the rotary switch MON0, setting it to 2. Display shows: E: Shows error. 2: Shows the rotary MON0 value.
The HMI display shows:
Now change the value of the rotary switch MON0, setting it to 3. Display shows: E: Shows an error. 3: Shows the rotary MON0 value. X: Shows the error in the installation
E: Shows an error. 0: Shows the rotary MON0 value. X: Shows the error in the installation Now change the value of the rotary switch MON0, setting it to 1. Display shows: E: Shows an error. 1: Shows the rotary MON0 value. X: Shows the error in the installation Copyright © 2017 INVENTIO AG
X: Shows the error in the installation
Now change the value of the rotary switch MON0, until it passes through the values from 0 to E, and check the error displayed on the display 1. In one position of the rotary switch, more than one error may be displayed. This is displayed alternately every 2 seconds. For example: ED1 > ED5 > ED1 > ED5, etc.
K42524400_EN_00
61
8. 8.3
Diagnostic See errors
Table of errors "0":
MON0 = 0 MON0 = 1 MON0 = 2 MON0 = 3 MON0 = 4 MON0 = 5 MON0 = 6 MON0 = 7 MON0 = 8 MON0 = 9 MON0 = A MON0 = B MON0 = C MON0 = D MON0 = E
MON1 = 0 Current condition E00 No errors registered E10 No errors registered E20 No errors registered E30 No errors registered E40 No errors registered E50 No errors registered E60 No errors registered E70 No errors registered E80 No errors registered E90 No errors registered EA0 No errors registered EB0 No errors registered EC0 No errors registered ED0 No errors registered EE0 No errors registered
MON1 = 5 Condition when the error occurred
Rotary switches in normal condition: SET0 = 8, SET1 = 0, MON0 = 0, MON1 = 8
Copyright © 2017 INVENTIO AG
K42524400_EN_00
62
8. 8.3
Diagnostic See errors
Table of errors "1":
MON0 = 0 MON0 = 1 MON0 = 2 MON0 = 3 MON0 = 4 MON0 = 5 MON0 = 6 MON0 = 7 MON0 = 8 MON0 = 9 MON0 = A MON0 = B MON0 = C MON0 = D MON0 = E
MON1 = 0 Current condition MON1 = 5 Condition when the error occurred E01 Frequency converter temperature exceeds 90º. E11 There has been an installation reset. E21 Failure contactor 5. E31 E41 There has been an installation emergency stop. E51 Failure at some point in the safety circuit. E61 The frequency converter voltage is below the appropriate value. E71 E81 There has been an over-current in the brake coil "1" of the machine. E91 There has been an emergency stop caused by the frequency converter. EA1 Machine encoder error: EB1 The elevator has not been used in more than 10 minutes. EC1 There was an error between the estimated speed and the actual installation speed. ED1 There has been a failure in data transmission of landing operating panel 1. EE1 There has been a failure in data transmission of landing operating panel 5.
Rotary switches in normal condition: SET0 = 8, SET1 = 0, MON0 = 0, MON1 = 8
Copyright © 2017 INVENTIO AG
K42524400_EN_00
63
8. 8.3
Diagnostic See errors
Table of errors "2":
MON0 = 0 MON0 = 1 MON0 = 2 MON0 = 3 MON0 = 4 MON0 = 5 MON0 = 6 MON0 = 7 MON0 = 8 MON0 = 9 MON0 = A MON0 = B MON0 = C MON0 = D MON0 = E
MON1 = 0 Current condition MON1 = 5 Condition when the error occurred E02 There has been one emergency stop. E12 E22 There has been two emergency stops. E32 The speed of the car is less than expected by the controller. E42 The voltage of the frequency converter is too low. E52 There was an error in the static part of the safety circuit (LED 29). E62 Error in the control circuit of the IGBT gates of the frequency converter. E72 There was an abnormal functioning of controller software four times. E82 There has been an over-current in the brake coil "2" of the machine. E92 There has been an over-current in the traction motor. EA2 The speed provided by the encoder does not match the pattern that should follow. EB2 The elevator has not been used in more than 16 minutes. EC2 Emergency stop caused by speed limit control. ED2 There has been a failure in data transmission of landing operating panel 2. EE2 There has been a failure in data transmission of landing operating panel 6.
Rotary switches in normal condition: SET0 = 8, SET1 = 0, MON0 = 0, MON1 = 8
Copyright © 2017 INVENTIO AG
K42524400_EN_00
64
8. 8.3
Diagnostic See errors
Table of errors "3":
MON0 = 0 MON0 = 1 MON0 = 2 MON0 = 3 MON0 = 4 MON0 = 5 MON0 = 6 MON0 = 7 MON0 = 8 MON0 = 9 MON0 = A MON0 = B MON0 = C MON0 = D MON0 = E
MON1 = 0 Current condition MON1 = 5 Condition when the error occurred E03 There was an abnormal functioning of controller software four times. E13 Serial communication error. E23 E33 There was an error due to abnormal high car speed. E43 There has been a reset following an installation emergency stop. E53 DC power failure for lack of an input phase. E63 E73 There was an abnormal functioning of controller software three times. E83 No current through the brake coil 1. E93 EA3 Emergency stop by frequency converter software. EB3 The elevator has not been used in more than 10 minutes. EC3 Emergency stop by speed limit control. ED3 There has been a failure in data transmission of landing operating panel 3. EE3 There has been a failure in data transmission of landing operating panel 7.
Rotary switches in normal condition: SET0 = 8, SET1 = 0, MON0 = 0, MON1 = 8
Copyright © 2017 INVENTIO AG
K42524400_EN_00
65
8. 8.3
Diagnostic See errors
Table of errors "4":
MON0 = 0 MON0 = 1 MON0 = 2 MON0 = 3 MON0 = 4 MON0 = 5 MON0 = 6 MON0 = 7 MON0 = 8 MON0 = 9 MON0 = A MON0 = B MON0 = C MON0 = D MON0 = E
MON1 = 0 Current condition MON1 = 5 Condition when the error occurred E04 There have been four abnormal car speed detections. E14 The capacitor of the frequency converter is defective. E24 There has been an installation reset. E34 The maximum travel time of the car has been exceeded. E44 Failure in the relay coil LB. E54 E64 Failure in the static part of the safety circuit which is displayed on the LED 29. E74 The car speed and that expected by the software are not suitable on 5 occasions. E84 Disconnected brake coil 1. E94 Motor overload during startup. EA4 Braking resistance failure. EB4 The elevator has not been able to start in more than 10 minutes. EC4 Speed limit protection is enabled. ED4 There has been a failure in data transmission of landing operating panel 4. EE4 There has been a failure in data transmission of landing operating panel 8.
Rotary switches in normal condition: SET0 = 8, SET1 = 0, MON0 = 0, MON1 = 8
Copyright © 2017 INVENTIO AG
K42524400_EN_00
66
8. 8.3
Diagnostic See errors
Table of errors "5":
MON0 = 0 MON0 = 1 MON0 = 2 MON0 = 3 MON0 = 4 MON0 = 5 MON0 = 6 MON0 = 7 MON0 = 8 MON0 = 9 MON0 = A MON0 = B MON0 = C MON0 = D MON0 = E
MON1 = 0 Current condition MON1 = 5 Condition when the error occurred E05 Overcurrent in traction motor E15 Car maintenance control panel activated. E25 Failure of the circuit that generates the signal of the IGBT gates. E35 The car is moving in the wrong direction: E45 Failure in the contactor number 5 coil. E55 12 Vdc power supply failure. E65 12 Vdc power supply failure. E75 The car speed and the speed expected by the software are not suitable on 4 occasions. E85 Failure in coil 1 of the brake activation. E95 The car speed is too high with respect to the expected. It is 0.125 m/sec higher than expected. EA5 EB5 The door does not open within more than 2 minutes. EC5 Door open. ED5 Communication failure between the controller and car. EE5 Communication failure between the controller and car.
Rotary switches in normal condition: SET0 = 8, SET1 = 0, MON0 = 0, MON1 = 8
Copyright © 2017 INVENTIO AG
K42524400_EN_00
67
8. 8.3
Diagnostic See errors
Table of errors "6":
MON0 = 0 MON0 = 1 MON0 = 2 MON0 = 3 MON0 = 4 MON0 = 5 MON0 = 6 MON0 = 7 MON0 = 8 MON0 = 9 MON0 = A MON0 = B MON0 = C MON0 = D MON0 = E
MON1 = 0 Current condition MON1 = 5 Condition when the error occurred E06 Overload in frequency converter braking resistance. E16 Incorrect information from the machine encoder. E26 E36 The maximum travel time of the car has been activated. E46 Activation failure of the brake coil BK1. E56 Control cabinet open. E66 Frequency converter temperature above 75° E76 The car speed and the speed expected by the software are not suitable on 3 occasions. E86 Failure in coil 2 of the brake activation. E96 Failure in the car load measurement system. EA6 Maximum travel time activated. EB6 The fuse has failed for more than 2 minutes. EC6 Trip curves RAM memory failure. ED6 Communication failure between the controller and car door. EE6 Communication failure between the controller and car door.
Rotary switches in normal condition: SET0 = 8, SET1 = 0, MON0 = 0, MON1 = 8
Copyright © 2017 INVENTIO AG
K42524400_EN_00
68
8. 8.3
Diagnostic See errors
Table of errors "7":
MON0 = 0 MON0 = 1 MON0 = 2 MON0 = 3 MON0 = 4 MON0 = 5 MON0 = 6 MON0 = 7 MON0 = 8 MON0 = 9 MON0 = A MON0 = B MON0 = C MON0 = D MON0 = E
MON1 = 0 Current condition MON1 = 5 Condition when the error occurred E07 Failure of the safety series corresponding to the outer lock and car door. Checked by LED 41DG. E17 There have been five failures in controller LB switch. E27 Control RL relay constantly ON. E37 The maximum control travel time of the car has been activated. E47 Failure in coil 2 of the brake activation. E57 Overload has occurred when the installation was being operated in recall mode. E67 The temperature of the frequency converter exceeded 90º. E77 E87 Brake coil BK1 short-circuited. E97 Controller power transformers failure. EA7 Overcurrent in control frequency converter EB7 Operating relay 60 failure: EC7 ED7 Communication failure between controller and car display. EE7 Communication failure between controller and car display.
Rotary switches in normal condition: SET0 = 8, SET1 = 0, MON0 = 0, MON1 = 8
Copyright © 2017 INVENTIO AG
K42524400_EN_00
69
8. 8.3
Diagnostic See errors
Table of errors "8":
MON0 = 0 MON0 = 1 MON0 = 2 MON0 = 3 MON0 = 4 MON0 = 5 MON0 = 6 MON0 = 7 MON0 = 8 MON0 = 9 MON0 = A MON0 = B MON0 = C MON0 = D MON0 = E
MON1 = 0 Current condition MON1 = 5 Condition when the error occurred E08 Failure of systems that check limit slowdown. E18 Relay 5 failed five times. E28 Installation water sensor activated. E38 There was an overvoltage on the frequency converter. E48 The input voltage is present on the installation. E58 Abnormal software command. E68 Communication from frequency converter temperature sensor interrupted. E78 E88 Brake coil BK2 short-circuited. E98 The car speed is too high with respect to the expected. It is 0.125 m/sec higher than expected. EA8 Car position error. EB8 Car door cannot be opened. EC8 ED8 There has been a failure in the data transmission of the operating control panel. EE8 There has been a failure in the data transmission of the operating control panel.
Rotary switches in normal condition: SET0 = 8, SET1 = 0, MON0 = 0, MON1 = 8
Copyright © 2017 INVENTIO AG
K42524400_EN_00
70
8. 8.3
Diagnostic See errors
Table of errors "9":
MON0 = 0 MON0 = 1 MON0 = 2 MON0 = 3 MON0 = 4 MON0 = 5 MON0 = 6 MON0 = 7 MON0 = 8 MON0 = 9 MON0 = A MON0 = B MON0 = C MON0 = D MON0 = E
MON1 = 0 Current condition MON1 = 5 Condition when the error occurred E09 E19 There has been a failure in the brake coil BK1 five times. E29 End of the anti-flooding operation. E39 Low frequency converter voltage E49 E59 The software initiated an installation emergency stop. E69 Overcurrent in the frequency converter. E79 E89 Power supply failure of the brake coil BK1. E99 Machine encoder error: EA9 Transmission failure of the load measurement system. EB9 Car Operation Panel (COP) failure. EC9 ED9 Car communication failure. EE9
Rotary switches in normal condition: SET0 = 8, SET1 = 0, MON0 = 0, MON1 = 8
Copyright © 2017 INVENTIO AG
K42524400_EN_00
71
8. 8.3
Diagnostic See errors
Table of errors "A":
MON0 = 0 MON0 = 1 MON0 = 2 MON0 = 3 MON0 = 4 MON0 = 5 MON0 = 6 MON0 = 7 MON0 = 8 MON0 = 9 MON0 = A MON0 = B MON0 = C MON0 = D MON0 = E
MON1 = 0 Current condition MON1 = 5 Condition when the error occurred E0A Load weighing system error. E1A There have been five failures in the BK2 brake switch. E2A E3A There have been four failures in the controller software. E4A E5A E6A Frequency converter over voltage E7A E8A Power supply failure of the brake coil BK2. E9A Machine encoder communication error: EAA Machine encoder communication error: EBA Door operator contacts error, end of opening or closing. ECA EDA Communication failure between the controller and outside landing operating panels/displays. EEA
Rotary switches in normal condition: SET0 = 8, SET1 = 0, MON0 = 0, MON1 = 8
Copyright © 2017 INVENTIO AG
K42524400_EN_00
72
8. 8.3
Diagnostic See errors
Table of errors "B":
MON0 = 0 MON0 = 1 MON0 = 2 MON0 = 3 MON0 = 4 MON0 = 5 MON0 = 6 MON0 = 7 MON0 = 8 MON0 = 9 MON0 = A MON0 = B MON0 = C MON0 = D MON0 = E
MON1 = 0 Current condition MON1 = 5 Condition when the error occurred E0B Error on the board E1. E1B There has been a low voltage on the frequency converter more than five times. E2B Contact failure of the folding balaustrade on the car roof. E3B The car speed and the speed expected by the software are not suitable on 4 occasions. E4B Error on the Frequency Converter load circuit E5B Abnormal braking distance. E6B Lack of a phase on DC power supply. E7B E8B Failure of brake coil BK1. E9B Overcurrent in traction motor EAB Failure in controller leveling system. EBB Car alarm failure. ECB EDB Communication failure between the controller and car. EEB
Rotary switches in normal condition: SET0 = 8, SET1 = 0, MON0 = 0, MON1 = 8
Copyright © 2017 INVENTIO AG
K42524400_EN_00
73
8. 8.3
Diagnostic See errors
Table of errors "C":
MON0 = 0 MON0 = 1 MON0 = 2 MON0 = 3 MON0 = 4 MON0 = 5 MON0 = 6 MON0 = 7 MON0 = 8 MON0 = 9 MON0 = A MON0 = B MON0 = C MON0 = D MON0 = E
MON1 = 0 Current condition MON1 = 5 Condition when the error occurred E0C Error in the UHS / DHS contacts. E1C E1 circuit error. E2C Brakes error. E3C Overcurrent on the frequency converter. E4C E5C E6C E1 circuit error. E7C Load sensor temperature less than 30º. E8C Error on the BK2 brake coil. E9C EAC Machine encoder error: EBC Cabin alarm not working. ECC EDC Communication failure between the controller and landing operating panels/displays. EEC
Rotary switches in normal condition: SET0 = 8, SET1 = 0, MON0 = 0, MON1 = 8
Copyright © 2017 INVENTIO AG
K42524400_EN_00
74
8. 8.3
Diagnostic See errors
Table of errors "D":
MON0 = 0 MON0 = 1 MON0 = 2 MON0 = 3 MON0 = 4 MON0 = 5 MON0 = 6 MON0 = 7 MON0 = 8 MON0 = 9 MON0 = A MON0 = B MON0 = C MON0 = D MON0 = E
MON1 = 0 Current condition MON1 = 5 Condition when the error occurred E0D Failure of the circuit that checks the signal of the door area. E1D Frequency converter ventilation error. E2D Error in opening brake retry. E3D Emergency stop due to the car speed not following the pattern preset by the controller. E4D E5D E6D DC power supply error. E7D Load sensor temperature between 30° and 40°. E8D E9D EAD EBD Elevators group malfunction ECD EDD EED
Rotary switches in normal condition: SET0 = 8, SET1 = 0, MON0 = 0, MON1 = 8
Copyright © 2017 INVENTIO AG
K42524400_EN_00
75
8. 8.3
Diagnostic See errors
Table of errors "E":
MON0 = 0 MON0 = 1 MON0 = 2 MON0 = 3 MON0 = 4 MON0 = 5 MON0 = 6 MON0 = 7 MON0 = 8 MON0 = 9 MON0 = A MON0 = B MON0 = C MON0 = D MON0 = E
MON1 = 0 Current condition MON1 = 5 Condition when the error occurred E0E Relay 5 error. E1E Error on the board E1. E2E E3E Encoder fails during normal operation. E4E E5E E6E Three phase supply poor. E7E Load sensor temperature over 60º. E8E E9E Car power supply source error. EAE EBE Electric main supply shut off. ECE EDE EEE
Rotary switches in normal condition: SET0 = 8, SET1 = 0, MON0 = 0, MON1 = 8
Copyright © 2017 INVENTIO AG
K42524400_EN_00
76
8. 8.3
Diagnostic See errors
Table of errors "F":
MON0 = 0 MON0 = 1 MON0 = 2 MON0 = 3 MON0 = 4 MON0 = 5 MON0 = 6 MON0 = 7 MON0 = 8 MON0 = 9 MON0 = A MON0 = B MON0 = C MON0 = D MON0 = E
MON1 = 0 Current condition MON1 = 5 Condition when the error occurred E0F LB relay error. E1F Frequency converter ventilation error. E2F Brake relays (BK) constantly activated. E3F Encoder error when the car is moving in inspection mode. E4F Encoder error. E5F E6F Power supply failure. E7F Failure of the A/D converter of the load measurement device. E8F Brake slide detection. E9F EAF EBF Car door contacts error (end closing or opening). ECF EDF EEF
Rotary switches in normal condition: SET0 = 8, SET1 = 0, MON0 = 0, MON1 = 8
Copyright © 2017 INVENTIO AG
K42524400_EN_00
77
9.
Rescue of Trapped Passengers Precaution Follow all safety instructions provided by the company to perform the rescue of passengers.
Step 1
Description Open the inspection panel which is located behind the landing operating panel on the top floor.
Copyright © 2017 INVENTIO AG
K42524400_EN_00
78
9.
Rescue of Trapped Passengers
Step
Description
2
Turn the main switch to OFF. To do this turn the "MAIN SWITCH" key.
3
Turn on the hoistway lighting; to do this use the Light (EMR/HIP) switch
4
Turn the RSQ switch to ON.
5
To open the brake press the button BKD. Do not press for more than 2 seconds continuously.
6
The car will begin to move. The direction depends on the load in the car, as it moves due to system imbalance.
7
Check the movement of the car through a hole in the top of the top floor panel, via the recall control panel. From this hole it is possible to see the overspeed governor rope, which is painted yellow when the car is at floor level.
8
When the car arrives at floor level stop pressing the BKD button and proceed to rescue passengers from the car. Follow all safety instructions of the company.
9
If the car does not move when the button BKD is pressed, it is likely that the system is balanced and it must therefore be placed out of balance. To do this, add weight to the compensation chain. This weight is placed permanently in the pit of the installation, together with a set of hooks for hanging.
Copyright © 2017 INVENTIO AG
K42524400_EN_00
79
9.
Rescue of Trapped Passengers
Step
Description
10
Once the weight is placed on the compensation chain, either in the car pulling or counterweight pulling area, depending on which direction we want to move the car, proceed to open the brake with the BKD button.
11
Once the car stops moving, if necessary, reposition the weights on the compensation chain to a higher level.
Copyright © 2017 INVENTIO AG
K42524400_EN_00
80
9.
Rescue of Trapped Passengers
During normal operation the board supplying power to the brake is E1, together with P1. With the recall control panel, brake activation is only affected by the E1 circuit and not by P1. When in normal operation the brake does not open (no voltage on the 420 line); upon activating the RSQ switch, the voltage that activates the brake comes from PSR2, which is a line coming from the battery. If the general power fails (line 420) and the batteries are not in good condition, the brake can be powered by an external 48 Vdc source at the terminals located on the HMI botton panel behind the top floor landing operating panel. These cables are located at the bottom of the HMI control panel and the ends are covered with rubber stops to prevent them from touching the cover.
Copyright © 2017 INVENTIO AG
K42524400_EN_00
81
Notes:
Copyright © 2017 INVENTIO AG
K42524400_EN_00
82
Schindler Management Ltd. Technical Competence Center Zugerstrasse 13 6030 Ebikon, Switzerland Phone +41 41 445 32 32 Fax +41 41 445 39 33 www.schindler.com
Related Documents
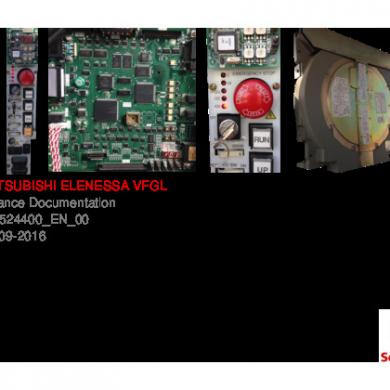
Main Ten Com
January 2021 1
Ten
February 2021 4
Main Line
February 2021 1
Main Nyasa
January 2021 1
The Mandalorian - Main Title
January 2021 0
Unidad 2 Ten
March 2021 0More Documents from "Adrian Chavez"