Kiki_witch_amigurumi_pattern_chiacrafts
This document was uploaded by user and they confirmed that they have the permission to share it. If you are author or own the copyright of this book, please report to us by using this DMCA report form. Report DMCA
Overview
Download & View Kiki_witch_amigurumi_pattern_chiacrafts as PDF for free.
More details
- Words: 2,008
- Pages: 9
Loading documents preview...
This
is
to
a
from Miyazaki
's
crochet
movie
"
delivery
Kiki 's
service
"
pattern 9
This pattern
@
was
Chia
who hopes you '
a
lot
written
by
crafts
Il
all
enjoy
!
94
it
@ chia wafts
READ ME
&
1
Tintin Few words before starting
I'm
licence !
the
:3
oahtfuhsfasram
Hello It
and
,
was
thank
made
with
This pattern and
Was
Please
the
out
you
distribute
when
I
hope
Chiara
,
pattern !
this
it
will
CR EMON
useful
be
@ Chi
aka
insert use
online
pattern
yourself
,
and
give
!
me It: the
.
Please
this
posting
'
and
and
,
try
to
a
crafts
.
Not
her
about
prepared by me for free shared
was
Kindly
Do
for being lot of love
the
"
Pattern by @
hashtag
#
Chi
chin
a
crafts
"
crafts patterns
credits
to
,
Material used ★ ★ ★ ★ ★ ★ ★ ★ ★ ★ ★
3.5 mm hook 3.0 mm hook 2.5 mm hook Tapestry needle Black safety eyes size 8.0 mm Stuffing (poly fiber fill is the best, otherwise some cotton wool will do) Light peach yarn size 3 Dark blue yarn size 3 Red yarn size 3 Dark brown yarn size 3 Orange yarn size 2
@ohiaoraftst2.OmmhooKtocrochetthebodyl.Dark brown
Dark blue
:
Red
M
Orange
Light peach
@ ohiawafts
Body Work the whole body (legs, torso, arms and ears) using light peach yarn and a 2.0 hook.
Legs R1: 5 sc in magic ring (5) R2-R12: 5 sc (5) For the first leg: make a slip stitch and cut the yarn (leave a long tail in case some sewing should be needed). Don’t cut the yarn after making the second leg instead, you’ll keep on working from there to join the legs
Torso R13: 2 sc in 2nd leg, chain 2, 5 sc in 1st leg, 2 sc in back of chain 2, 3sc in 2nd leg (14) Now we’re enlarging to create the booty! R14: (1 sc, inc) x 3, 8 sc (17) Make enough stitches R15-R17: 17 sc (17) R18: (1 sc, dec) x 3, 8 sc (14) to move the stitch marker Booty finished :) from here to there ! R19: 14 sc (14) R20: (5 sc, dec) x 2 (12) R21: (4 sc, dec) x 2 (10) Stitch marker Back R22: (3 sc, dec) x 2 (8) R23: (2 sc, dec) x 2 (6) Left side R24: (1 dec, 4 sc) (5) R25: 5 sc (5) Time to start the head R26: 5 inc (10) , Front R27: 10 inc (20) R28: (sc, inc) x 10 (30) At this point, your stitch marker is probably somewhere , ! ← Booty behind the doll’s back (use the booty as a reference to understand which is the front and which is the back). You must now make enough stitches to position the stitch marker right on the left side of the doll before moving on with the next round. If you’re indeed on the back, this operation should not increase the number of rounds you count on the face of the doll. However, if you were somewhere just past the left shoulder, you are indeed adding one round to the face. It
¥" I
I
.
Body Work the whole body (legs, torso, arms and ears) using light peach yarn and a 2.0 hook.
Legs R1: 5 sc in magic ring (5) R2-R12: 5 sc (5) For the first leg: make a slip stitch and cut the yarn (leave aIs : long tail in case some sewing should be needed). Don’t cut the yarn after making the second leg instead, you’ll ⇐ : keep on working from there to join the legs
÷
Torso
.
÷
R13: 2 sc in 2nd leg, chain 2, 5 sc in 1st leg, 2 sc in back of chain 2, 3sc in 2nd leg (14) Now we’re enlarging to create the booty! R14: (1 sc, inc) x 3, 8 sc (17) I: R15-R17: 17 sc (17) Iii R18: (1 sc, dec) x 3, 8 sc (14) Booty finished :) Ii , R19: 14 sc (14) R20: (5 sc, dec) x 2 (12) Ii: R21: (4 sc, dec) x 2 (10) R22: (3 sc, dec) x 2 (8) ⇐ R23: (2 sc, dec) x 2 (6) R24: (1 dec, 4 sc) (5) R25: 5 sc (5) Time to start the head R26: 5 inc (10) R27: 10 inc (20) R28: (sc, inc) x 10 (30) At this point, your stitch marker is probably somewhere behind the doll’s back (use the booty as a reference to understand which is the front and which is the back).⇒ You must now make enough stitches to position the stitch marker right on the left side of the doll before moving on with the next round. If you’re indeed on the back, this operation should not increase the number of rounds you count on the face of the doll. However, if you were somewhere just past the left shoulder, you are indeed adding one round to the face. It
→⇒⇒
I:
is
=:
⇒
-7
.
" .
@ chia wafts
won’t impact a lot the look of the doll, you just have to keep in mind to place the eyes one round higher than indicated :) Why are we making this? Because we’re about to give an asymmetrical shape to the head to make the face… if you don't place the stitch marker correctly, you risk to end up with a doll facing left, right, or, even worse, with the head completely twisted around! R29: (1 sc, inc) x 8, 14 sc (38) R30-R31: 38 sc (38) R32: 1 sc, (dec, 2 sc)x 5, dec, 15 sc (32) R33-R37: 32 sc (32) Stop and place the safety eyes between round 33 and round 34, 8 sc apart. Feel free to modify the position to where you feel suites at best the personality of your doll. I personally think that placing the eyes very low and quite apart gives a sweeter look :) If you’d like to make an embroidery for the eyes, that’s the best moment to do it! Keep stuffing while you close the head! R38: (4 sc, dec) x 5, 2 sc (27) R39: 2 sc, dec, (3 sc, dec) x 4, 3 sc (22) R40: dec, (2 sc, dec) x 5 (16) R41: (sc, dec) x 5, 1 sc (11) R42: 5 dec, pull out the yarn Cut the yarn leaving a long tail for sewing. Using a tapestry needle, pass the tail through all the loops of the last round, and pull. Make a knot and hide the yarn inside the doll’s body.
Arms Make 2 R1: 5 sc in magic ring (5) R2-R10: 5 sc (5) At the end of each arm, cut the yarn leaving a long tail for sewing. Sew the arms so that the upper part corresponds to round 23 of the body (right below the neck).
Dress Use dark blue yarn and hook 3.0
@ ohiawafts
We start working in rows, but we’ll join the extremities later on and start working in rounds Row1: chain 13 (12) Row2: 2 sc, chain 4, skip 2, 4 sc, chain 4, skip 2, 2 sc (16) Row3-Row4: 16 sc (16) Join the extremities and start working in rounds R5: 3 sc, inc, 7 sc, inc, 4 sc (18) R6: (5 sc, inc) x 3 (21) R7: (6 sc, inc) x 3 (24) R8: (5 sc, inc) x 4 (28) R9: (3 sc, inc) x 7 (35) R10: (4 sc, inc) x 7 (42) R11: 2 sc, (inc, 5 sc) x 6, inc, 3 sc (49) R12: 49 sc (49) Cut the yarn and make a knot. Hide the tail in the dress 6 t L
Sleeves
2
3
4
5
8
g
it
to
→
is
iz
-0000000000000 BE 6664
ROW I
rows
-
¥%g%¥i§ 20k¥ 6k¥
Use dark blue yarn and hook 3.0 Sleeves are worked in rounds. Start crocheting the sleeves in the hole left by (chain 4, skip 2) in Row2 of the top part. You should start with 8 sc, which means you must make 1 stitch in each loop of the chain, 1 stitch in each of the 2 stitches skipped + 2 stitches in the junctures between the two. Overall, you’ll get the 8 sc of round 1 R1: 8 sc (8) R2: (3 sc, inc) x 2 (10) Cut the yarn and leave a long tail for sewing. Sew the sleeves to the dress to keep the arms down.
Hair Work with dark brown yarn and 3.5 hook. First chain 24. You’re going to create one hair in each loop of this chain. Then, you’ll get to sew the hairs one by one to the head (feeling lucky, eh?) You should make (in this order): R1: chain 24 (main chain) R2-R19(=18 hairs): chain 16 in second loop from hook, go back to the main chain with 15 sc, make a stitch in loop after
s
I
Eo
£
B
,
.
A
tee
How to
the
start
sleeve
.
-
⑧⑧⑧ a
:
R19-R23 (= 5 hairs): chain 9 in second loop from hook, go 1) First sew Oh back to the main chain with 8 sc, make a stitch in loop after top of the Pull a piece of yarn through all the loops of the main chain, head pull and make a knot. First sew the central part of the wig on the top of the head (pay attention that the hairs should be in the correct position). Then you can proceed with sewing it in the middle and then in the lower part. Maybe the graphic instructions are more 2) Start with the first long explicit :) hair after the short ones
Even hairs -
Ribbon
freedom leave the
odd
Use orange yarn and size 2.5 hook Make 2 R1: chain 5 R2: 3 sc in same lop, 2 sc, 2 sc in same loop, 2 sc (9) R3: 9 sc in inner loop only R4: 2 dec, 5 sc (7) Pull out the yarn, cut it and leave a long tail for sewing
@ ohiawafts
on
weirdies
to
.
f
, ⑥⑧q%§y
the
other
next to the
Use red yarn and 3.5 hook shorter heirs We’re going to prepare two separate parts and then sew them together Each part is worked in rows Row1: chain 7 (6) Row2: 6 sc Turn without making the additional loop at the end of the row Row3: 5 sc Turn without making the additional loop at the end of the row Row4: 4 sc Turn without making the additional loop at the end of the row Row5: 3 sc Turn without making the additional loop at the end of the row Row6: 2 sc Turn without making the additional loop at the end of the row make two of these parts and join them in the middle. Turn a couple of times a piece of yarn around the juncture. chain 16 to make the headband. Sew the ribbon on the headband.
Shoes
hairs
¥0
f
.
Sarthe
§,
I
the
y
the
Sew all
w
forehead
3) Sarthe Ones
the more
.
even
This hair
,
messy
heirs
Odd
hairs
will
and
and
oh
give "
more
Kiki
odd
volume
to
the
make
will
the
top of
like
"
as Join
in
the middle
of
:*: middle
ends
Bag Use orange yarn and size 3.0 hook R1: chain 8 R2: make 14 stitches around the chain (2 in first and last look of the chain, 1 in the other) (14) R3: inc, 5 sc, 2 inc, 5 sc, inc (18) R4-R6: 18 sc (18) R7: make 17 sc, then turn the work and start working in rows Row8-Row9: 8 sc Row10: 7 sc Row11: 6 sc
Bye bye ! -
And
we're
done !
' -
I
I
hope you enjoyed it unit
@ ohiawafts
wait
to
see
the
is
result ! ! !
Chiara
More Documents from "Mica Oliveira"

Kiki_witch_amigurumi_pattern_chiacrafts
January 2021 0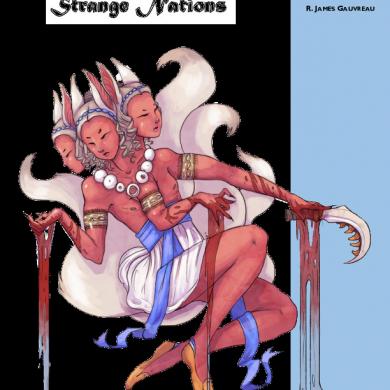
Strange Nations: A Worldbuilding Resource
January 2021 0

Resp_civil_geral_2016
February 2021 1
Automoveis_rcf_e_app_2016
February 2021 2